
The complexity of Accounts Receivables boils down to the fact that the idea and reality of the process are different, and most firms fail to build the right systems to manage it.
In theory, the AR process is simple. For example, John (a customer) bought seven pairs of shoes from Jonah (a shoe seller) in January 2024. Each pair is $300, so John is expected to pay Jonah $2,100 by March 1, 2024.
By February 29, 2024, John had sent the $2,100 payment to Jonah. The Account Receivable transaction is complete, and everyone is happy.
The AR process is different in reality because;
- Customers don’t always pay on time. Businesses have to commit additional resources to the collection process (this includes phone calls, using collection agencies, and maybe even taking legal action).
- Disputes are common. This could result from a mismatch between the quantity ordered, the quality delivered, and the amount owed, which may require some back-and-forth between AR teams and customers.
- Invoice approval is not straightforward. They often require multiple approvers, and businesses (your client’s customers) pay multiple suppliers (every month), which makes Accounts Receivables more complex than expected.
For these reasons, AR teams need Accounts Receivable process flowcharts to visualize and standardize the collection of your clients’ accounts receivable.
This keeps your team from the stress of figuring out how to manage the complexity of the process. It also makes it faster to collect these payments.
This article will teach you how to leverage flowcharts for quicker and more consistent AR results.
What Does a Typical Accounts Receivable Process Look Like?
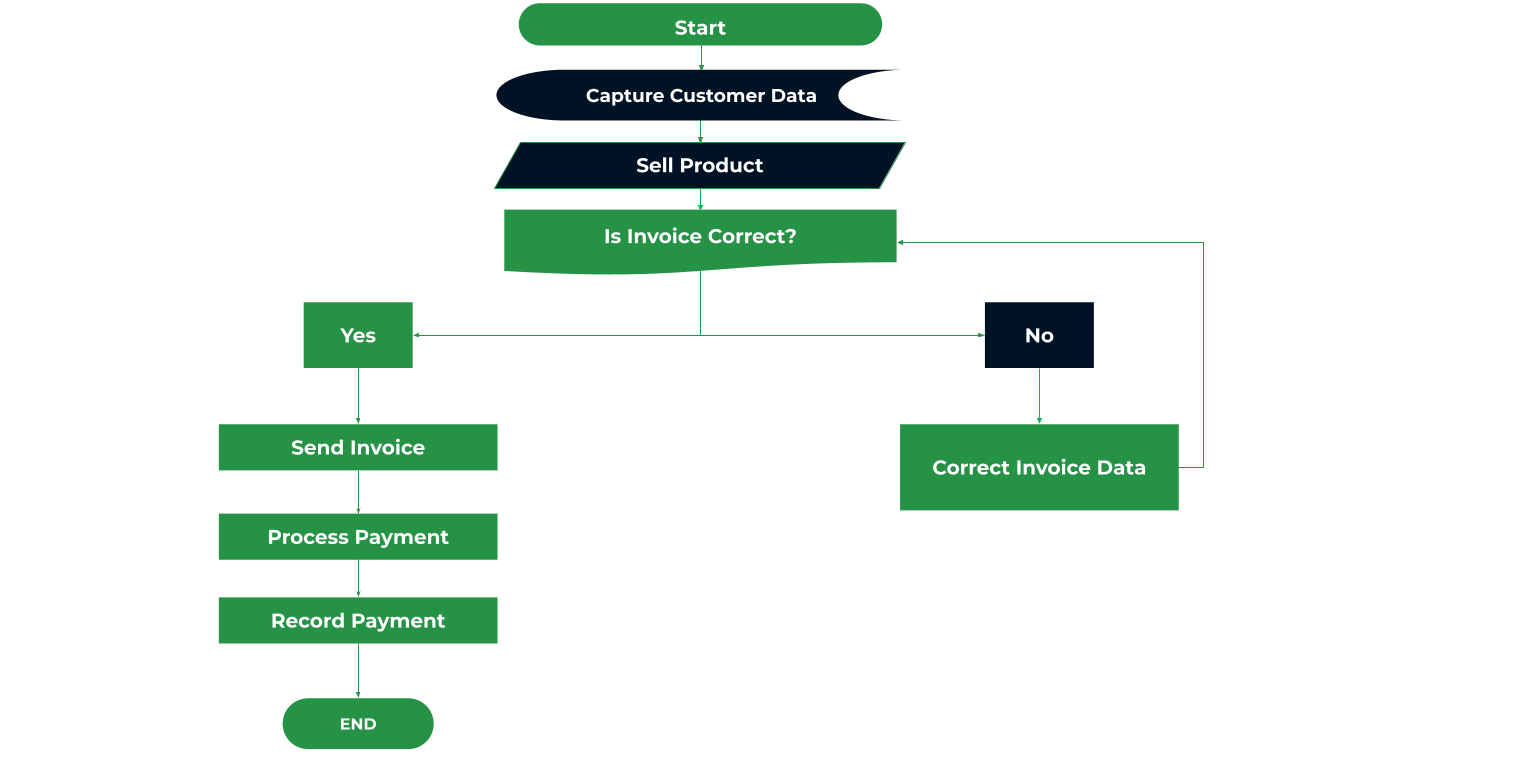
Here are the steps of a typical Accounts Receivable process
- Deliver product (or service) at an agreed amount and with clear payment terms.
- Capture customer data for accurate invoicing.
- Generate and send invoices according to the data captured in the previous step.
- Resolve disputes to match the information on the invoice with the quantity and cost of products delivered.
- Manage collection by following up on overdue invoices.
- Payment processing by transferring the money from the customer to the business (your client).
- Reconcile payment to ensure the payment received is consistent with the amount on record.
Download the editable version here
Benefits of Accounts Receivable Process Flowchart
a. Improved Understanding of the AR Process
As we’ve seen, the Accounts Receivable process can get very complex. Communicating the flow of tasks in writing will require you to describe the individual steps (and their interconnection) with so many words.
As visual tools that explain the sequence of tasks in a process, flowcharts communicate the process steps in one view.
In that way, your team members can see the process from start to finish without struggling to read through a large body of text, making them easier to understand.
Similarly, they do not only state the steps in the process but also the role of each team member. This helps everyone know when their tasks are due and, possibly, how they should do them.
b. Streamlined Workflow and Reduced Errors
When an AR process is visually presented (in a flowchart), it’s easier to spot the bottleneck and redundant steps in the workflow.
Flowcharts also provide a single source of truth for everyone by outlining the steps, possible outcomes, and alternatives in one place.
This helps your team to channel their energy into implementing the steps and finding solutions to problems arising from the process.
These will reduce waste (of time and resources) and the chances of error in your Accounts Receivable process.
c. Faster Invoice Processing and Collection Time
The easier your team members can understand the requirements of each step in your process, the faster they can complete their tasks.
This gives customers what they need to complete their payments on time.
d. Simplified training and onboarding of new staff
Your new team members might already be overwhelmed with documentation and paperwork.
Presenting your AR process in a visually appealing form makes it more easily digestible, empowering them to make the most of the information they need to complete any task in the AR project.
Moreover, Flowcharts enable you to organize the information your new staff need to complete AR tasks (to your firm’s standard) into action commands, linked with arrows that show a clear path to follow to complete such tasks.
Accounts Receivable Process Flowchart Diagrams & Templates
a. Order fulfilment
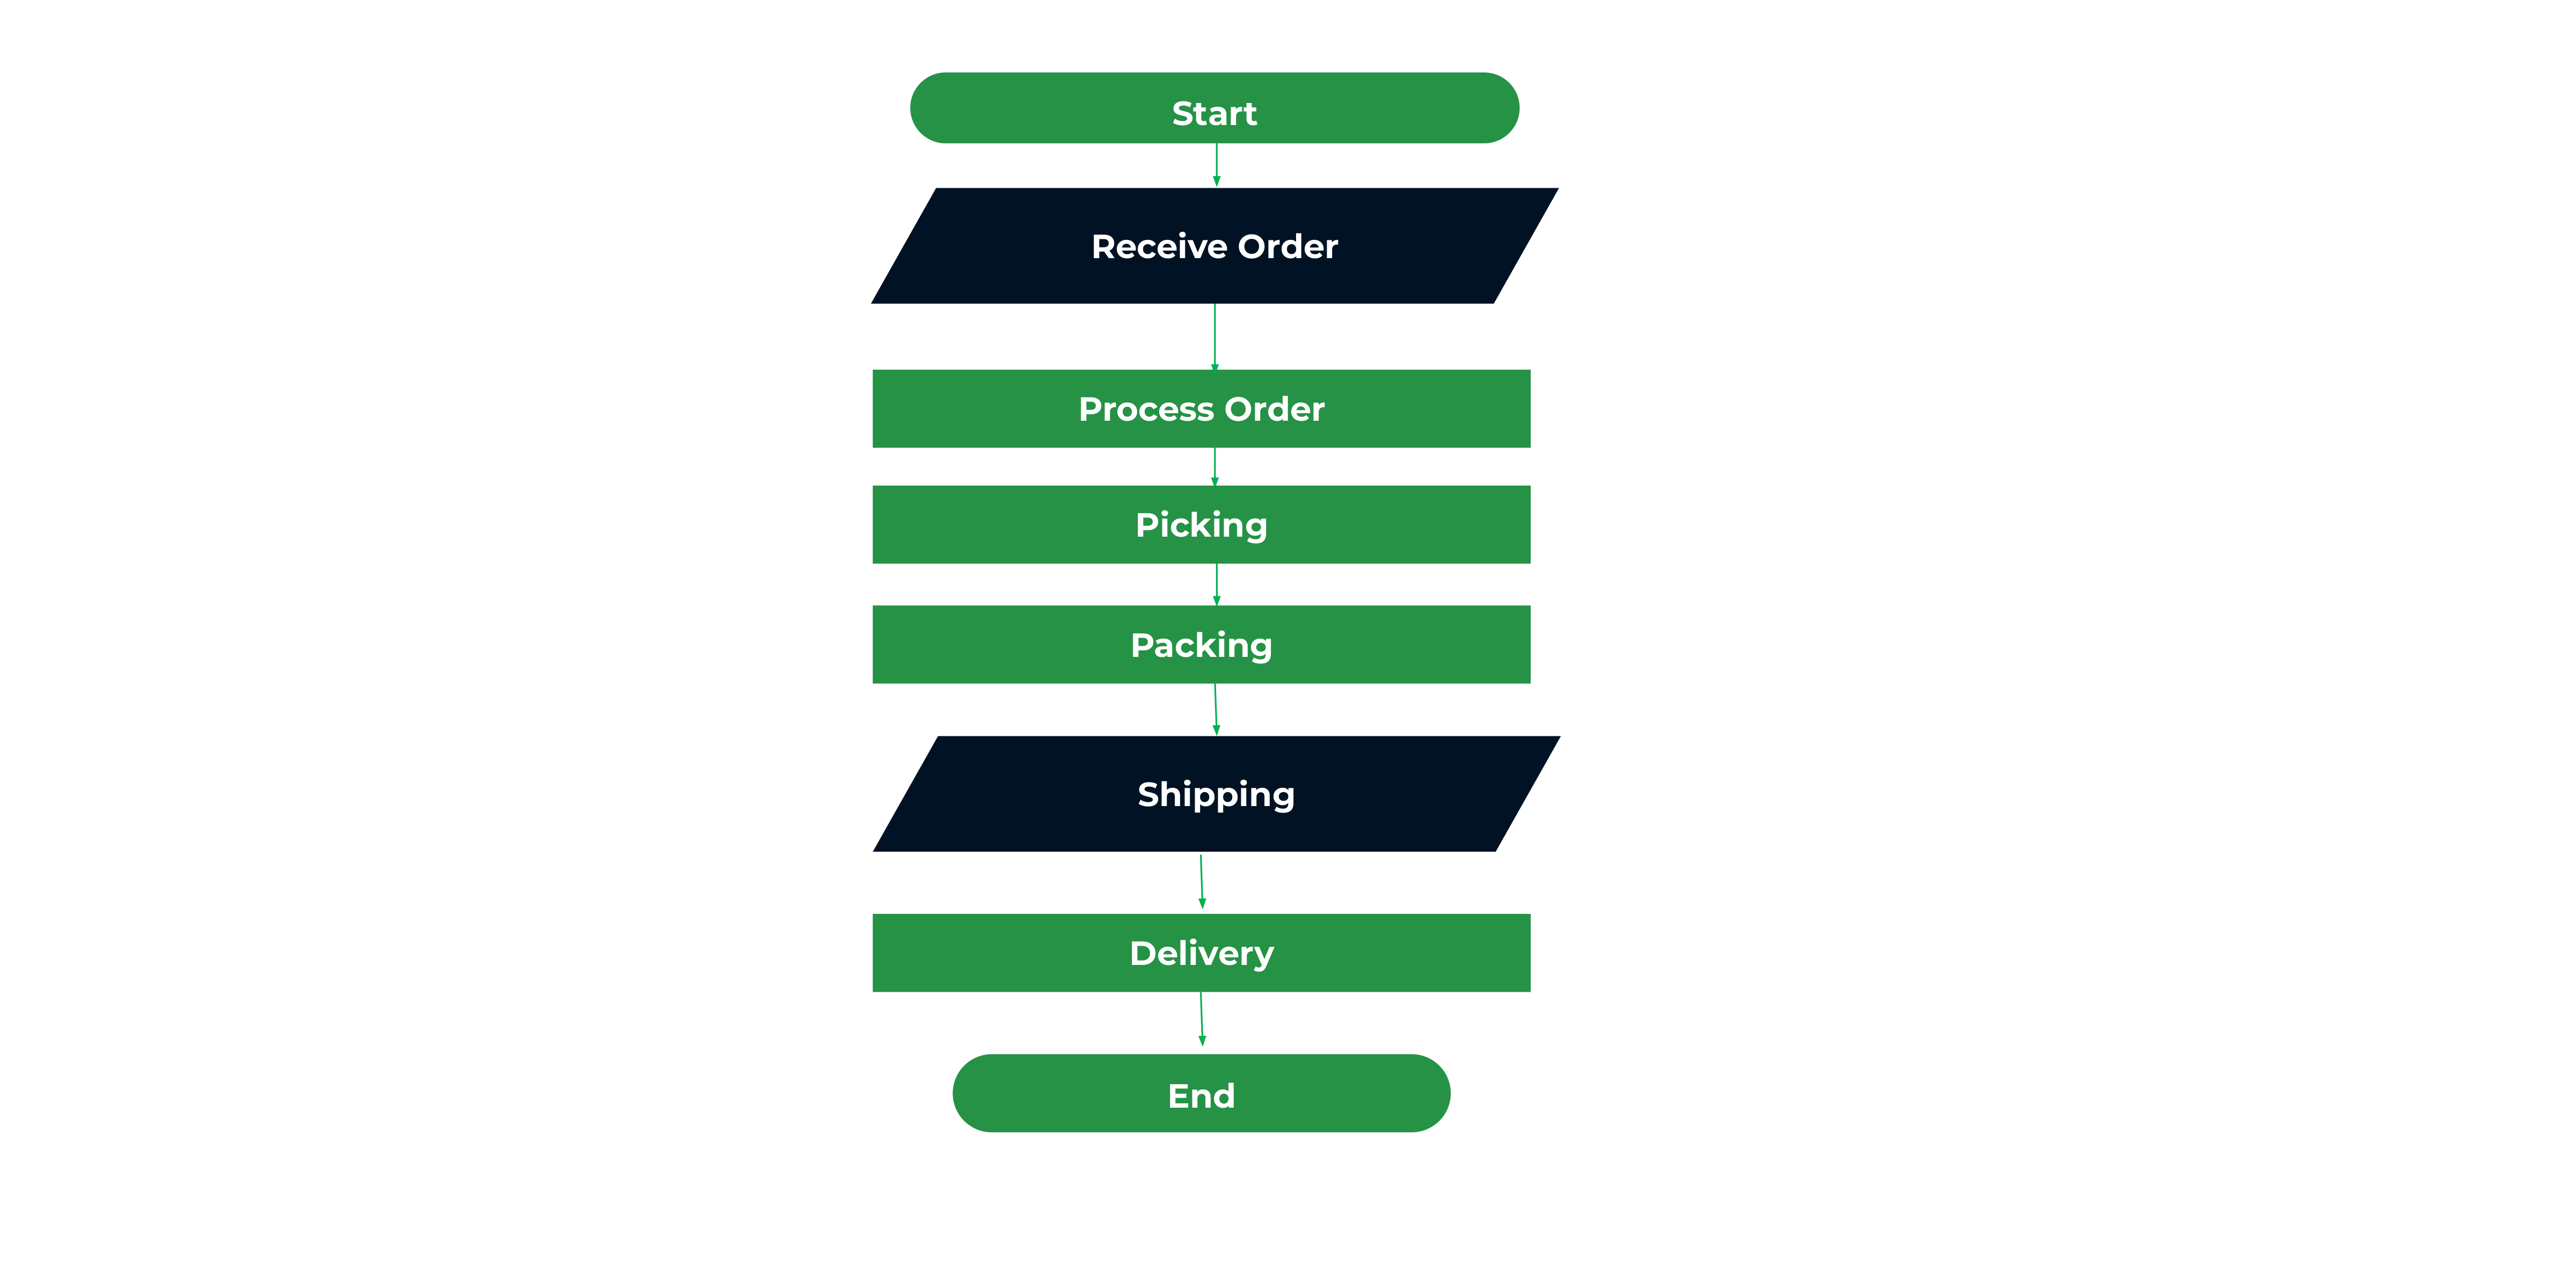
Download the editable version here
b. Invoice Generation and Issuance
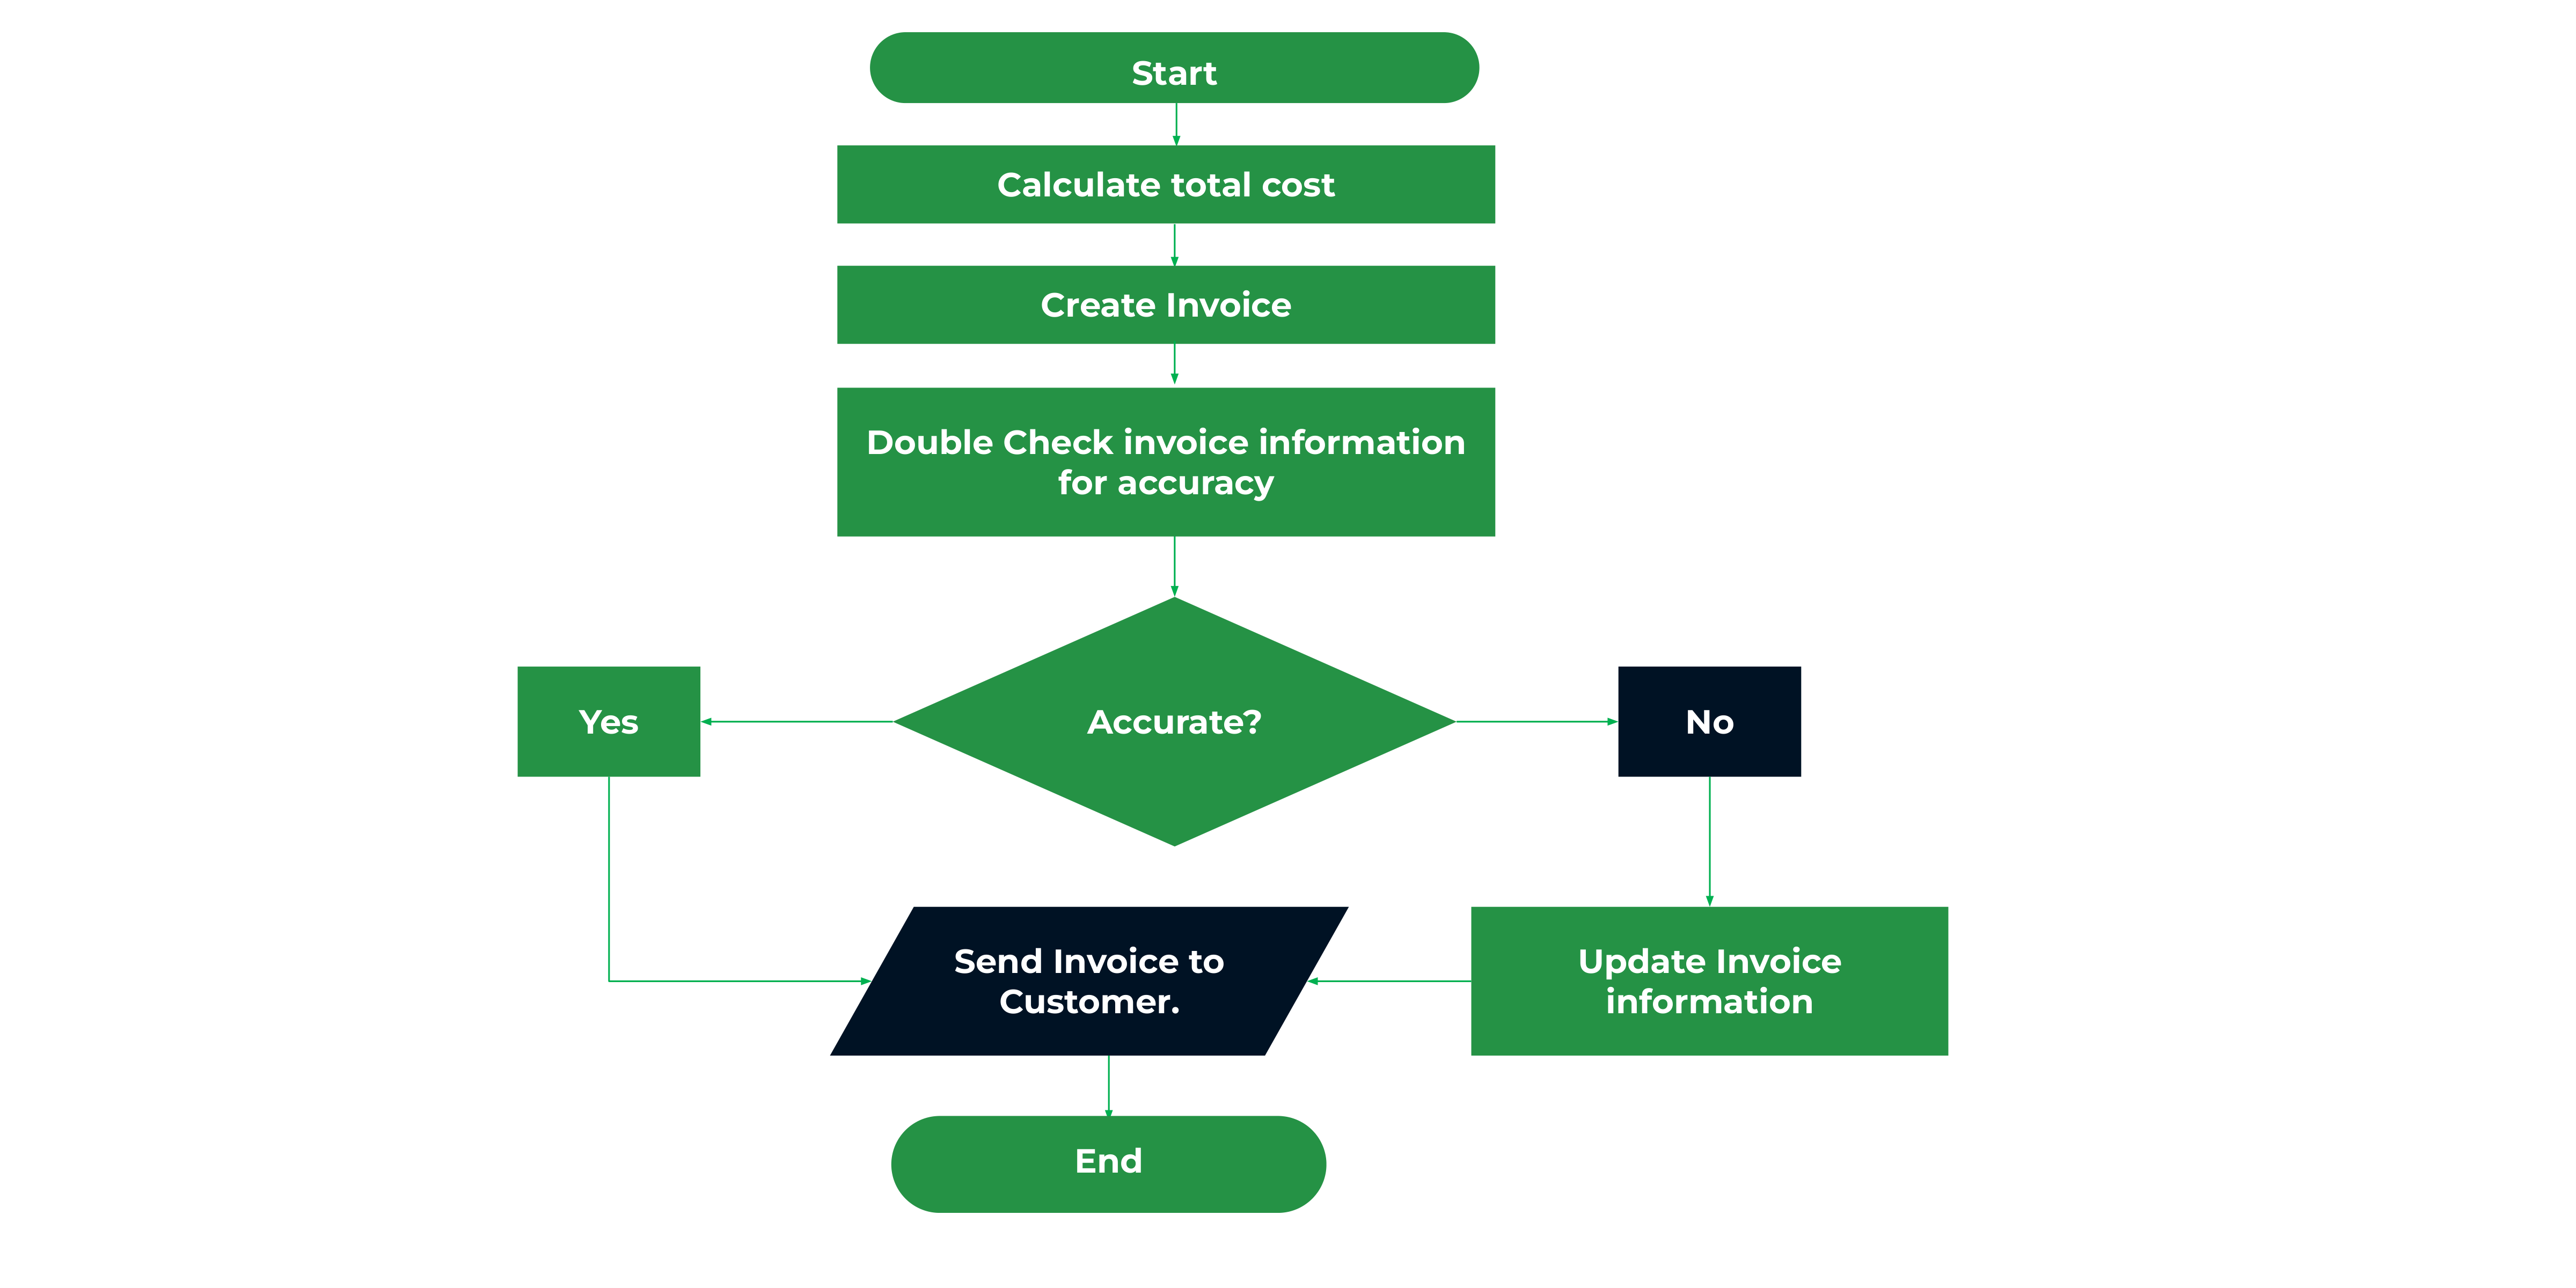
Download the editable version here
c. Payment Collection and Follow-up
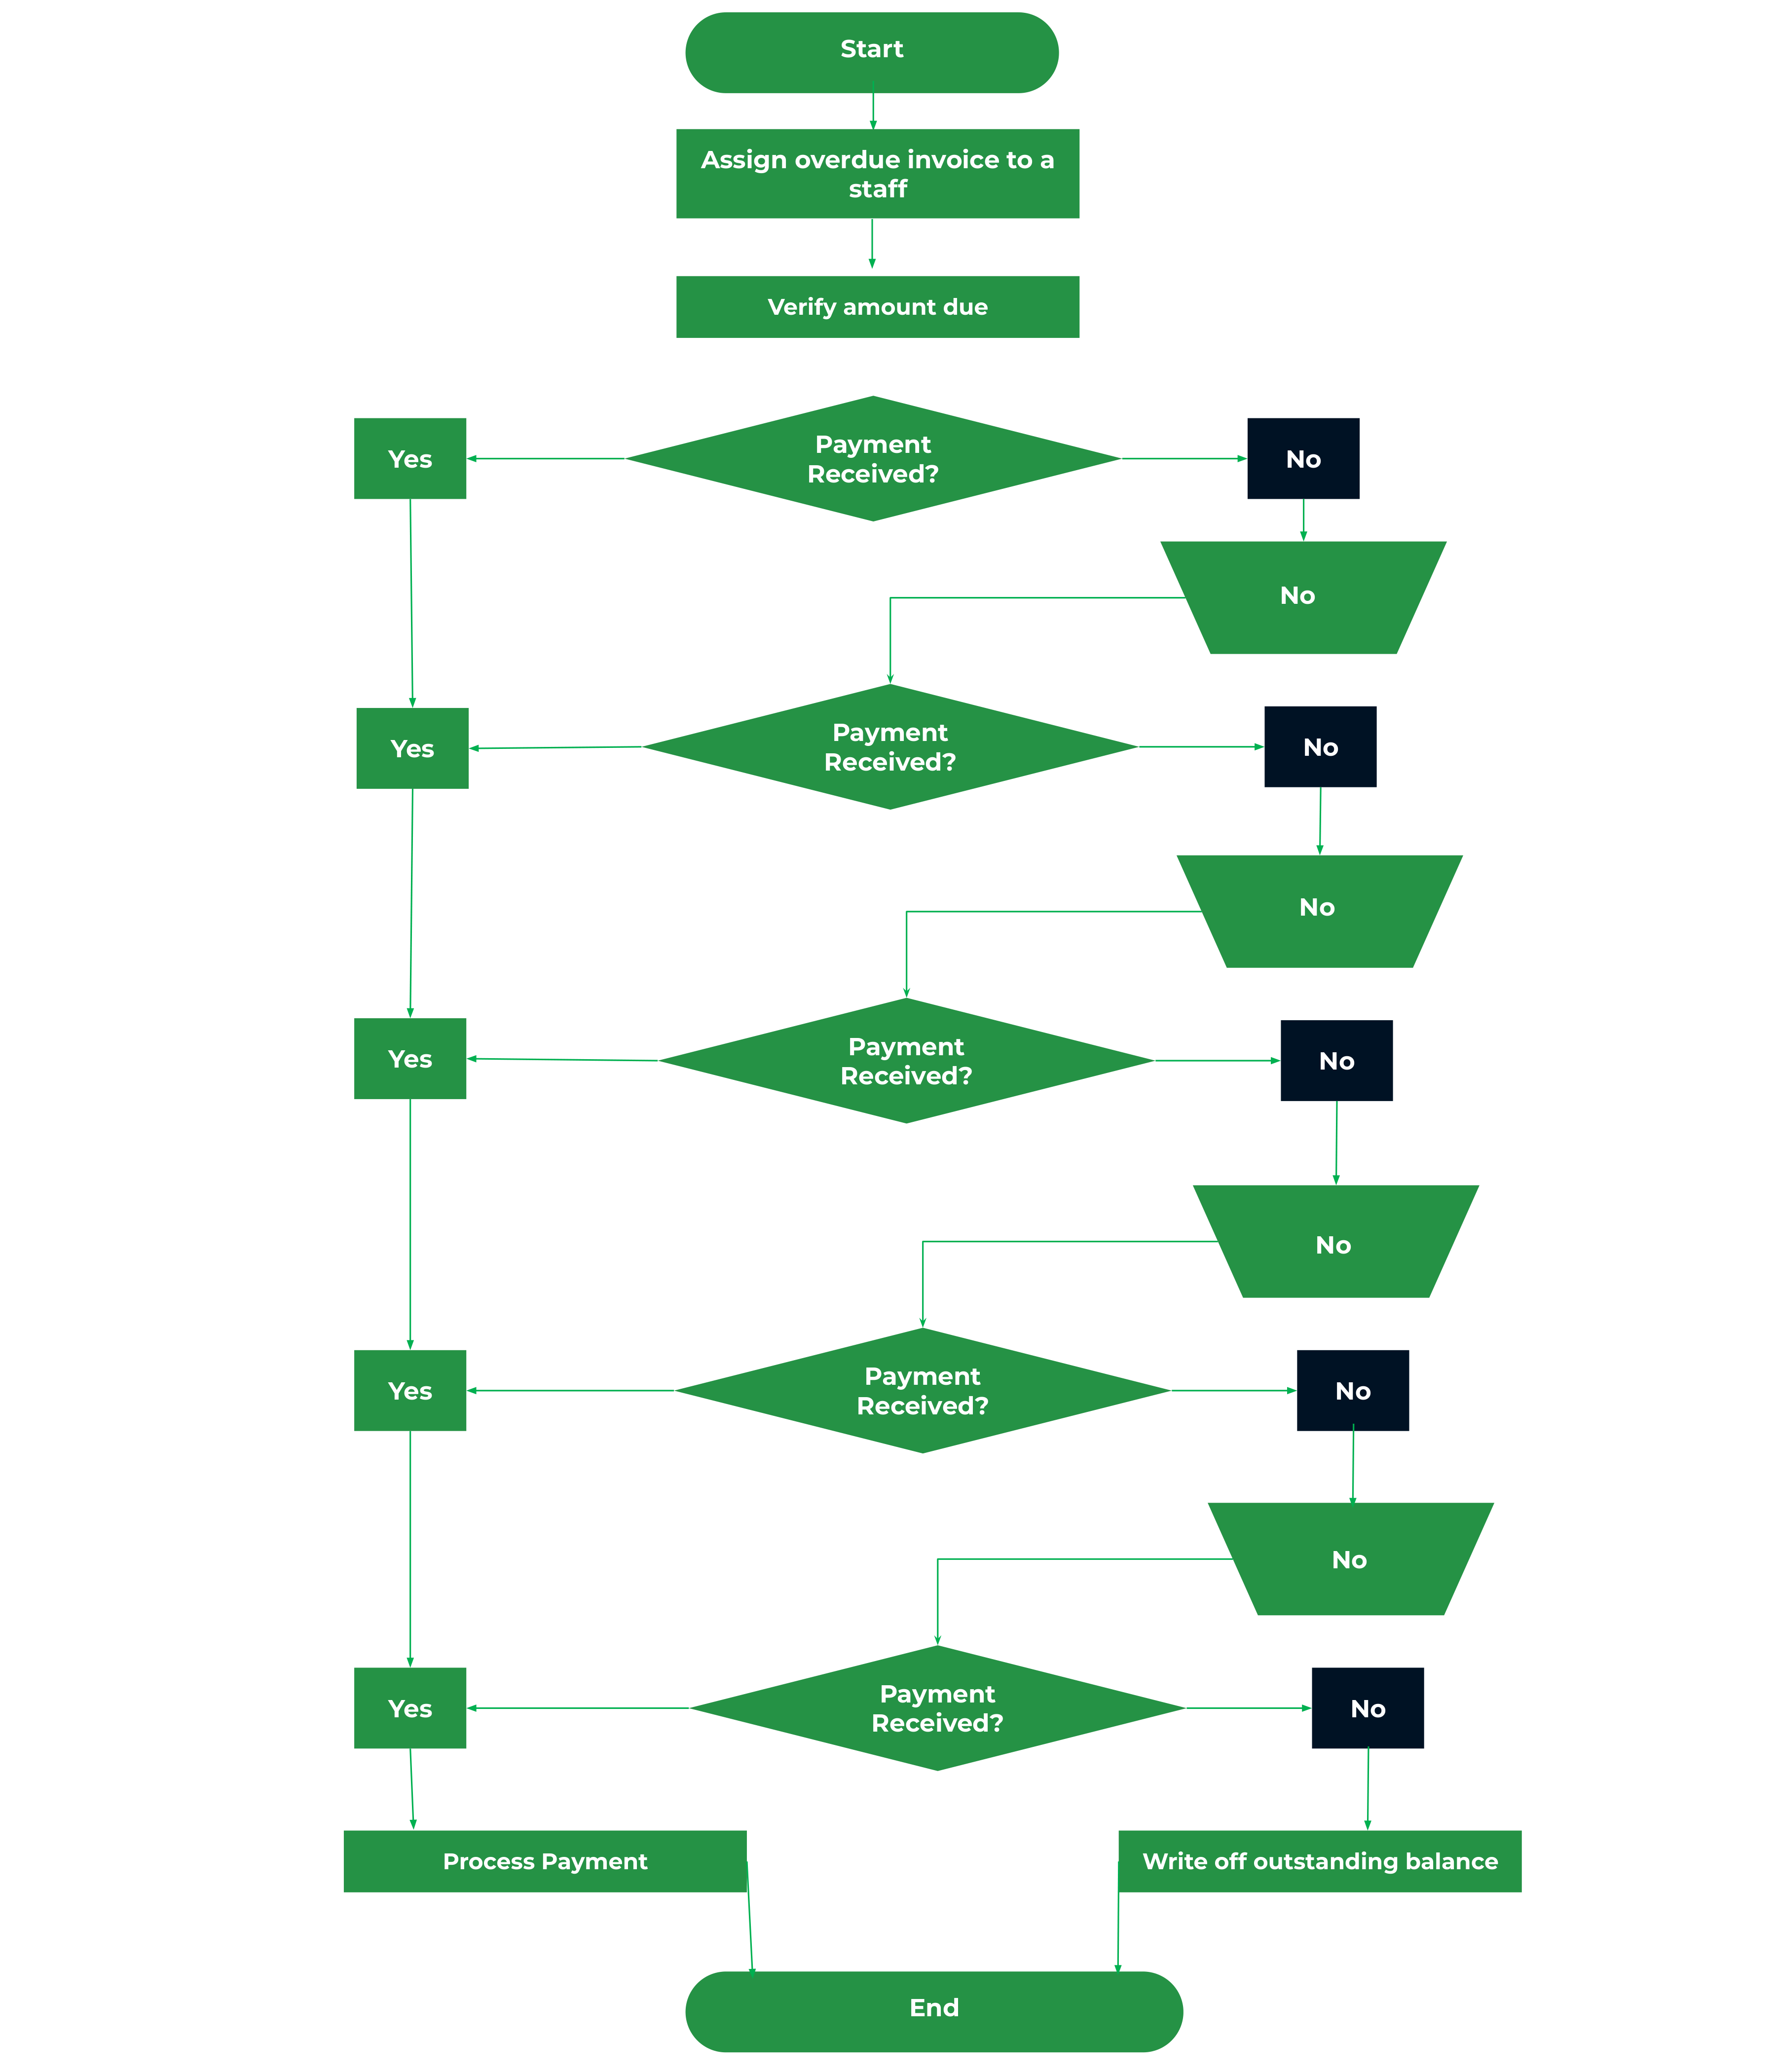
Download the editable version here
d. Payment Recording and Reconciliation
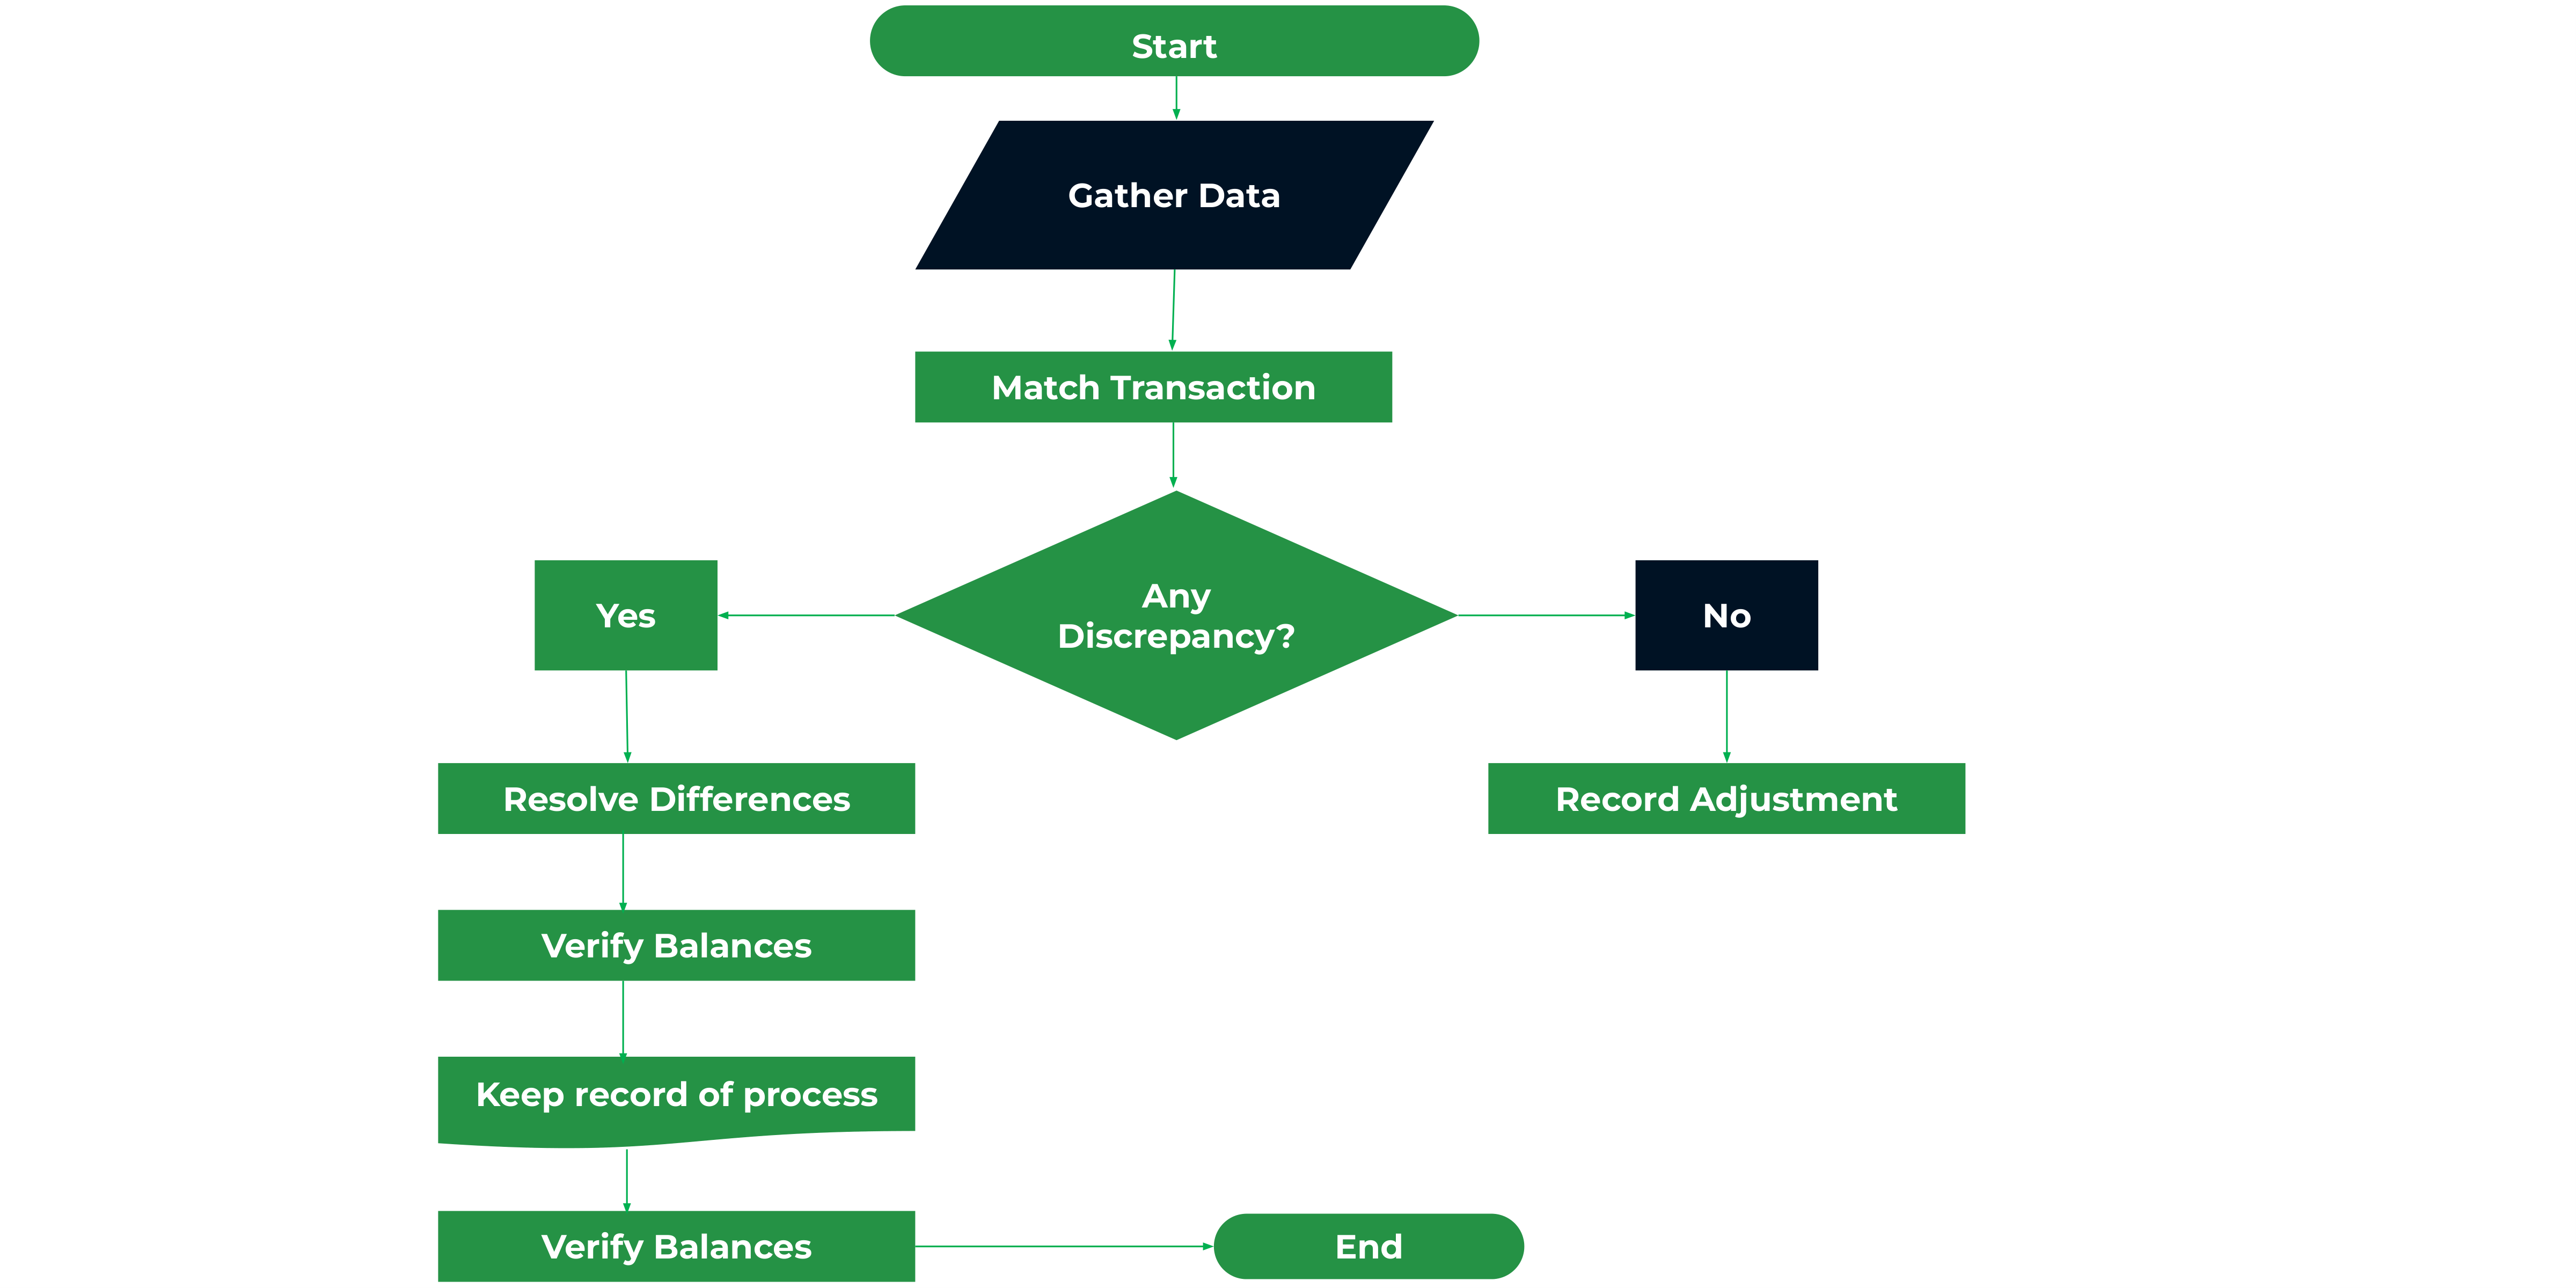
Download the editable version here or download our free accounts receivable reconciliation checklist template.
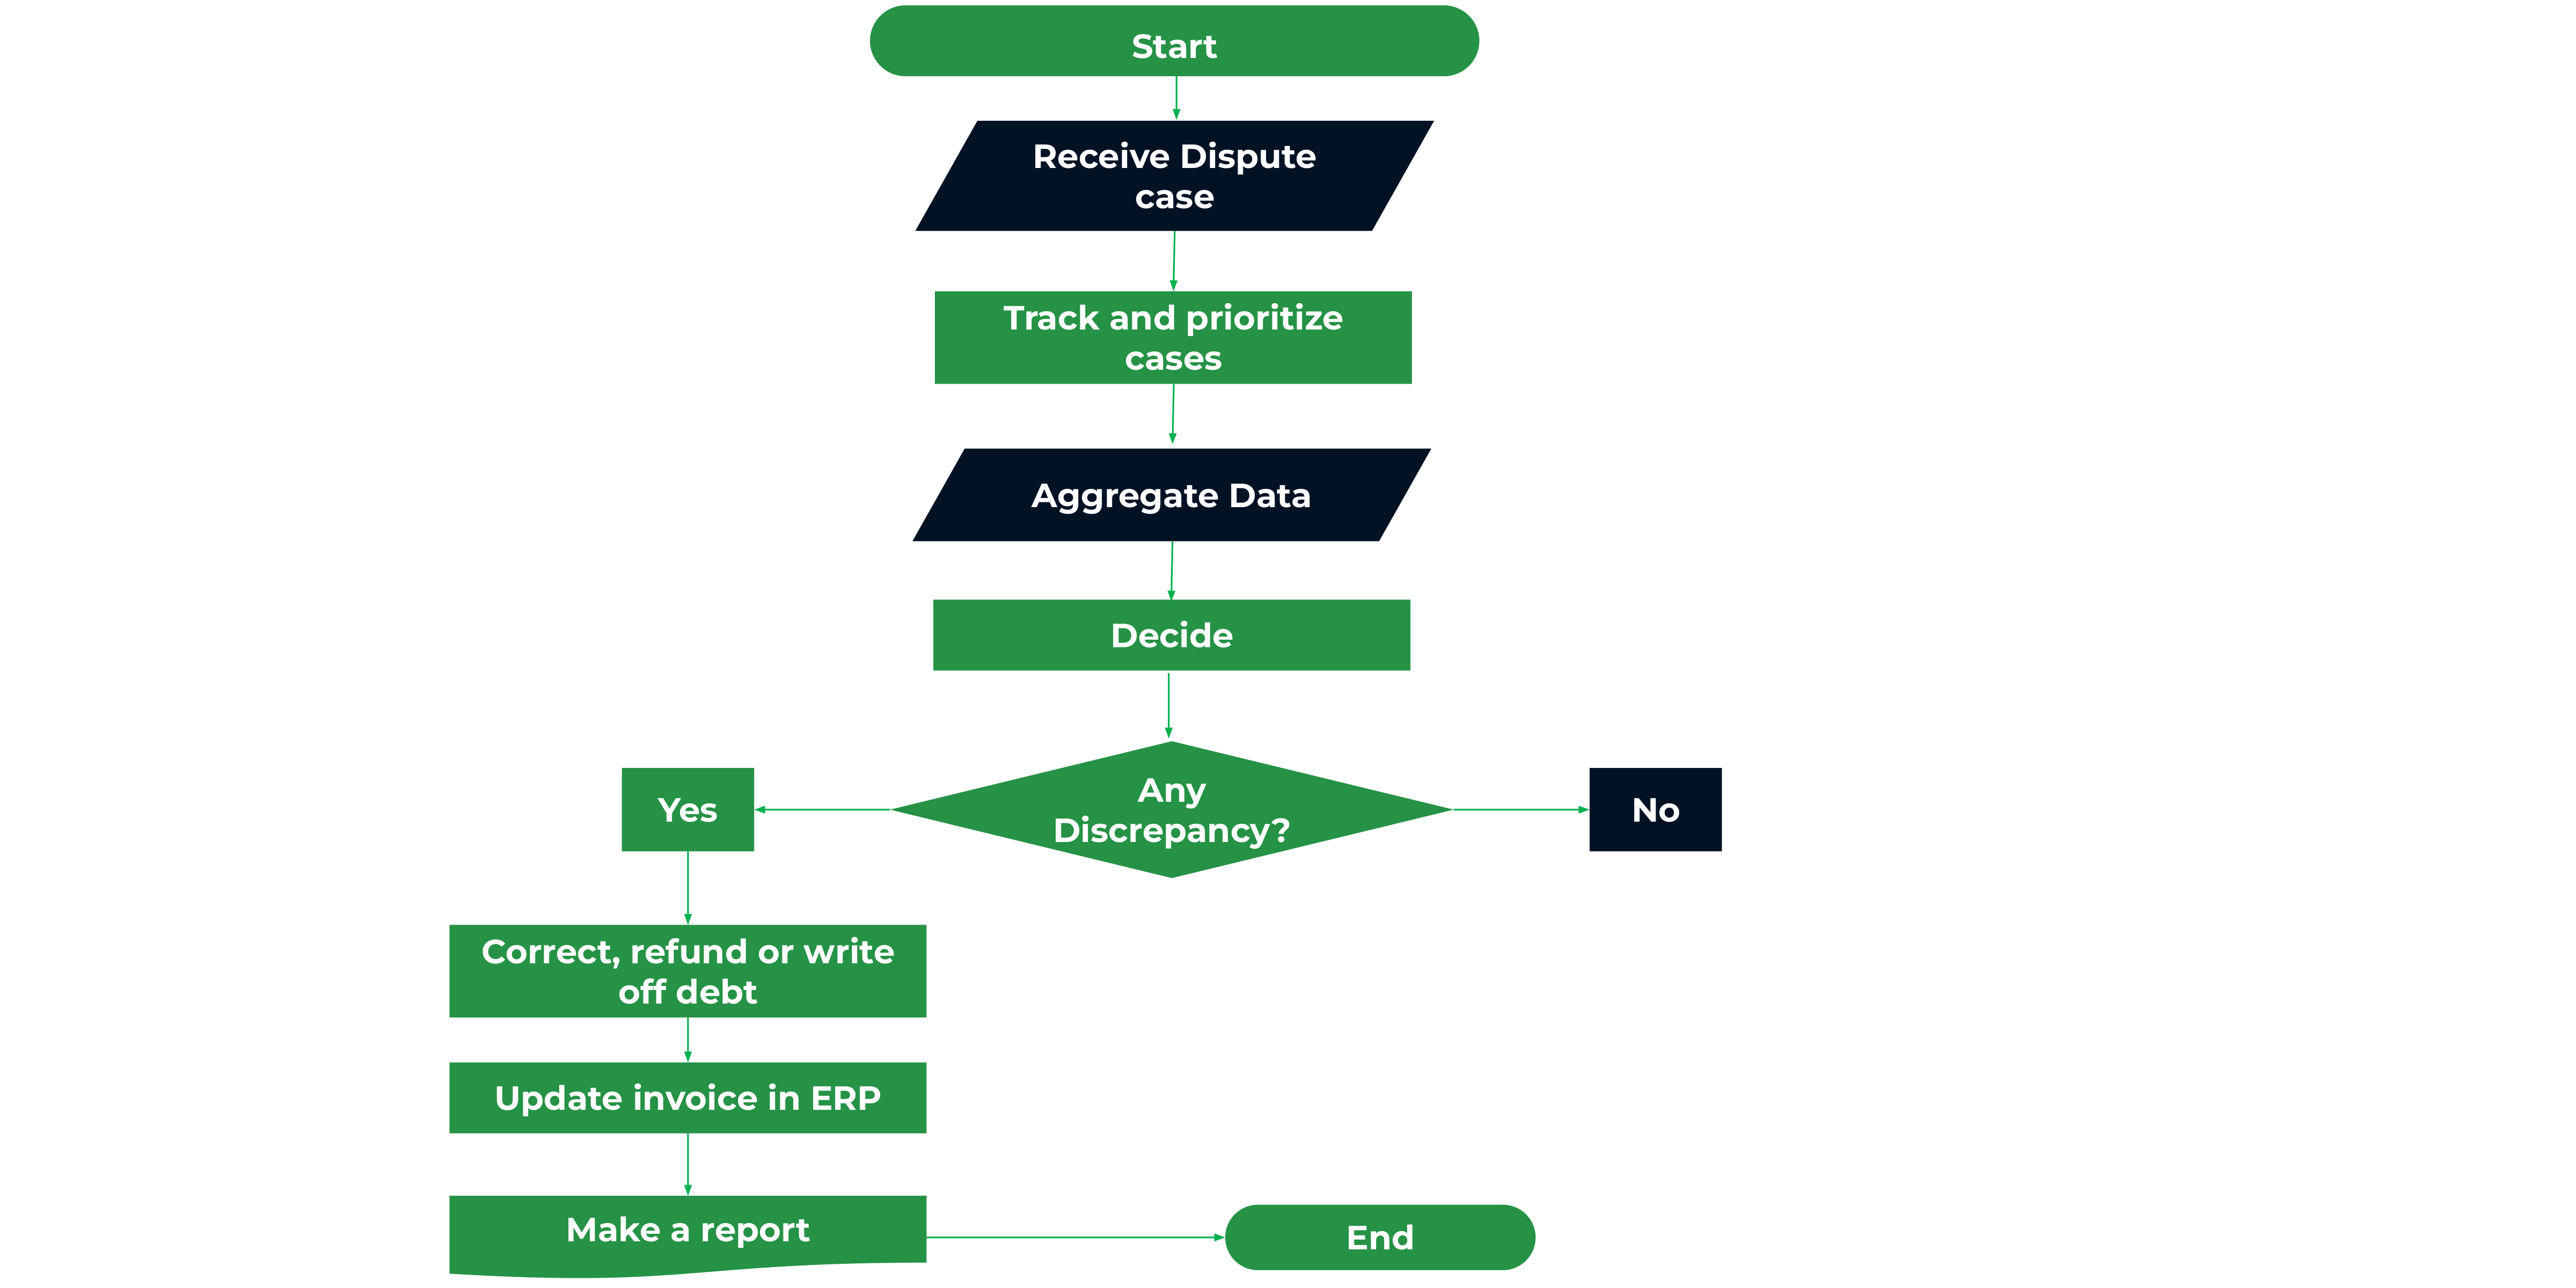
e. Dispute Resolution
Recommended Resource:
Accounts Receivable Workflow Process: An Easy Step-by-Step Guide
How to Create Your Accounts Receivable Flowchart
a. Define Your Scope and Boundaries
Once you’ve decided to create an Accounts Receivable flowchart, you need to determine how detailed you want the flowchart to be.
If it’s too high-level, it will communicate less information than your team members need to complete their AR tasks. If it’s too detailed, it gets overwhelming.
Knowing what you’re trying to achieve with the flowchart will help you balance brevity with detail.
For example, the step “send payment reminders” can be further broken down into sending dunning letters and emails and placing phone calls. But you have to decide when to break it down like so or leave it as one step.
b. Choose Your Flowchart Tool
The pen-and-paper method can work but requires more time and manual intervention.
Flowchart software is preferable because it saves time and provides several opportunities for automation and collaboration.
Tools like Lucidchart, SmartDraw, and Edrawmax are popular options, but you should choose a tool according to your budget and its ease of use.
c. Map Out (and Represent) Key Steps with the Right Flowchart Symbols
At this point, list the steps that make up your AR process and represent them with the corresponding flowchart symbol.
This means representing all process steps with the rectangle shape and the decision (yes/no) steps with the diamond shape. You can find these symbols in the shape menu of most flowchart tools.
If you use flowchart software, you can take advantage of their templates. Once you know what each symbol or step represents, you can choose the template that suits your AR procedure.
d. Consider Decision Points and Alternatives
The ability to communicate alternative steps based on different outcomes is a benefit of the Accounts Receivable process flowchart.
This step helps you to tell your team what to do in a Yes/No situation.
For example, your team can:
- Process payment if the customer has made the payment.
- Send payment reminders if the customer fails to make payment.
Since both scenarios cannot be correct for an AR transaction, your flowchart should tell your team what to do if either scenario occurs.
When done well, this task ensures that your team knows what to do in any event.
e. Identify Responsible Parties
Flowcharts are more efficient when your team members know the tasks that fall to them in the flow of work.
By identifying responsible parties and assigning their tasks to them, they can get their work done accurately and when it’s due to make the receivables collection more efficient.
f. Add Any Extra Information
Flowcharts might be mostly diagrams, but you can add text to clarify the objective and information on how to complete any step.
This is much easier if you use flowchart software. Right-click on the shape and select the Add Note button. Enter the additional information and click done.
Anyone visiting that flowchart will see the extra note you’ve added to the steps and can use it where necessary.
g. Build Your Flowchart
If you’ve followed the steps so far, all you need to do here is arrange the steps (as represented by the shapes) and connect them with lines or arrows to show the flow of the Accounts Receivable process.
The steps should be arranged in their order of performance so that all assignees can understand the order of events.
h. Review and Update Periodically
At this stage, you want to ensure that the Account Receivable process flowchart is clear, appealing, and easy to understand. Check for the accuracy of each step and the symbols representing them.
You should also ensure that the lines or arrows point in the right direction.
With flowchart software, you can invite your team members to review the diagram. A second pair of eyes can easily spot an error you couldn’t see.
The review should be a continuous task. This will enable you to improve the flowchart as you learn to complete your Accounts Receivable process quicker and more efficiently.
Streamline Your Projects: Add Your Accounts Receivable Flowcharts to Your AR Projects in Financial Cents
The average business owner sends multiple invoices (every month) that need to be tracked.
Successful cash collection requires an organized and collaborative system to manage your AR (and other accounting client projects) and your clients from one place.
Otherwise, managing your AR flowcharts and the Account Receivable process in two separate tools amounts to more time spent coordinating projects and less time growing your firm.
Fortunately, you can manage it all (Accounts Receivable, monthly bookkeeping, month-end close, tax returns, etc.) alongside your other client work in your Financial Cents workflow dashboard.
Create and add flowcharts to your projects in Financial Cents and start delegating and tracking them today.
Use Financial Cents for your accounting firm’s workflow needs.


