As an accounting firm, before you prepare financial statements for a client, you first need to confirm that their books are balanced. If total debits don’t equal total credits, the reports you produce won’t be accurate, and that can lead to delays, rework, or even compliance issues.
That’s where the trial balance comes in. It lists every account in the general ledger and checks whether the books add up. It’s a straightforward but essential step for ensuring accuracy before you create financial reports.
Using a trial balance worksheet makes this process faster and more reliable. Instead of setting up columns or calculating totals manually, a template gives you a ready-to-use format with built-in formulas. It saves time, reduces errors, and keeps your workflow consistent across clients.
In this article, we’ll explain why trial balance worksheets matter, break down their key components, show you common errors they help catch, and share a free trial balance template your firm can start using today.
Why Use a Trial Balance Worksheet?
Whether you’re closing the books monthly or prepping year-end financials, a well-structured trial balance worksheet is important. Here’s why:
Detecting Errors Early
The main goal of a trial balance is to make sure total debits equal total credits. If they don’t, it’s a sign that something went wrong, and it’s better to catch it before you finalize reports or send anything to a client.
For example, let’s say you’re working on the books for a retail business. They recorded a $2,500 customer payment as a debit to their bank account but forgot to credit Accounts Receivable. That’s a one-sided entry. When you plug the balances into your worksheet, the totals won’t match, flagging the error right away.
Organizing Ledger Balances
When you’re managing books for multiple clients, pulling account balances directly from the general ledger can quickly get messy. A trial balance worksheet brings all the information into one place, in a clean, structured format.
Instead of flipping between reports or exporting ledgers from your accounting software, you get one sheet where:
- All account names are listed in one view
- Debits and credits are clearly separated
- Adjustments are easy to add
- Accounts are grouped by type: assets, liabilities, equity, revenue, and expenses
Let’s say you’re working with a nonprofit. They need their expenses broken down by function, for example, “Program Services” and “Administrative.” A trial balance worksheet lets you organize accounts manually or with formulas, so everything is grouped in a way that fits how they report to their board.
This structure also helps your team collaborate more efficiently. Everyone works from the same format and can jump in without needing a long explanation, whether they’re reviewing, adjusting, or finalizing the books.
Simplifying Reporting
A completed trial balance makes it much easier to move from the general ledger to financial statements. Once your debits and credits match, you have a clear, organized snapshot of every account. Revenue and expense accounts flow directly into the income statement. Asset, liability, and equity accounts go to the balance sheet.
Instead of rebuilding reports from scratch, you can pull everything straight from the worksheet. This saves time and reduces errors, especially when handling month-end close for multiple clients.
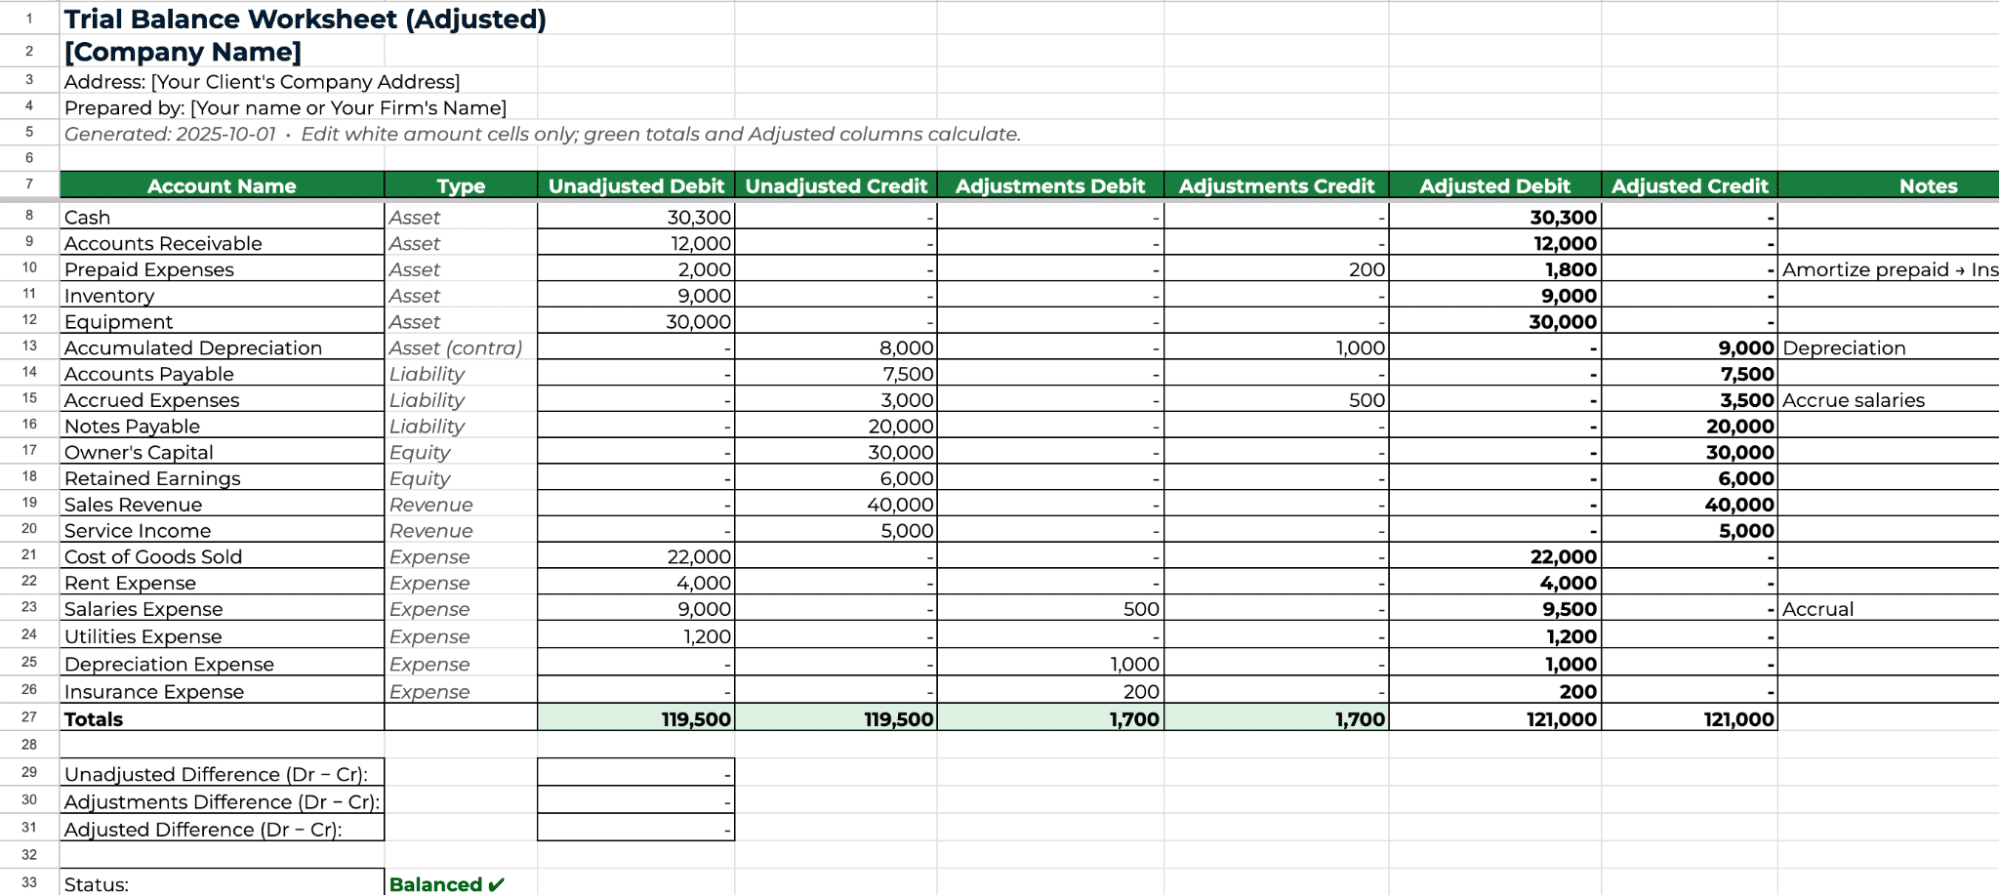
Key Components of Trial Balance Template
Here’s what a good trial balance template should include:
Account Names
- Assets: e.g. Cash, Accounts Receivable, Equipment
- Liabilities: e.g. Accounts Payable, Accrued Expenses, Loans
- Equity: e.g. Owner’s Capital, Retained Earnings
- Revenues: e.g. Sales, Service Income
- Expenses: e.g. Rent, Salaries, Utilities
This layout mirrors the structure used in financial statements, making it easier to scan for missing, duplicate, or misclassified accounts.
Debit Column
A good trial balance template includes a clearly labeled Debit column to record the ending debit balances for each account. This column typically includes positive balances for Asset accounts and Expense accounts.
The template should align each debit balance with the correct account name, making it easy to review and calculate totals. This structure is especially important when preparing the income statement, where all expense totals are pulled directly from debit balances.
Credit Columns
It should also have a Credit column where you record all the ending credit balances. This column typically holds balances for liability accounts, equity accounts and revenue accounts.
Each account should appear in either the debit or credit column—never both—depending on its balance. This structure makes it easy to verify totals and helps prevent classification errors.
Adjustments
A trial balance worksheet may include an Adjustments column, especially if you’re reviewing the unadjusted trial balance before finalizing reports. While not required in every case, it’s a useful feature when you need to:
- Add accruals, depreciation, or correcting entries
- Prepare an adjusted trial balance ahead of financial reporting
- Track changes during a bookkeeping cleanup or client review
- Leave notes or internal comments for team members
Including an adjustments column gives your team room to apply changes without editing original balances. It also keeps the review process transparent, especially when handing off work or preparing audit-ready records.
Totals for Error Checking
Finally, it should have automatic totals for both the debit and credit columns. These totals help you instantly check if the debits equal the credits.
If the totals match, your worksheet is balanced. If they don’t, it’s a clear sign that something’s wrong, and you’ll need to review the entries.
Your Free Excel Trial Balance Worksheet Template
To make your month-end reviews easier, we’ve created a free trial balance worksheet template you can download and start using immediately. We’ve designed it to help you quickly verify that your clients’ books are balanced before moving on to prepare financial statements.
This template includes the components we covered previously (account names, debit columns, credit columns) and built-in formulas that automatically calculate debit and credit totals instantly. If they don’t match, you’ll know right away.
Common Errors Trial Balances Can Detect
Here are some of the most common issues a trial balance can flag:
Transposition Errors
This happens when you accidentally reverse digits during data entry, for example, entering $2,193 instead of $2,913. These errors can cause imbalances between the debit and credit columns and throw off your entire balance.
Without a trial balance check, which detects it, this small mistake could carry through to the balance sheet.
Incorrect Posting
Errors can also happen when you post a transaction to the wrong type of account or the wrong side (debit vs credit). For example, you record a payment of $55,000 to a vendor as a debit to Sales Revenue instead of a debit to Accounts Payable. This inflates revenue and leaves your liabilities unaffected. A trial balance check will show credits outweigh debits, signaling something is off.
Double-Posting or Omissions
If a transaction is entered twice, or not at all, your books won’t balance. For example, you accidentally recorded a rent expense of $3,000 twice, now your debits are $3,000 too high, and your income statement is inflated with extra expenses. Or you forget to post a $5,000 customer payment, meaning your cash balance is understated, and your debits and credits won’t match.
In either case, the trial balance helps you catch the mistake. When the totals don’t align, it’s a clear sign that something’s missing or duplicated and you need to trace it back to the ledger.
Best Practices for Using Trial Balance Worksheets
To get the most value out of your trial balance worksheet and avoid wasting time fixing errors later, follow these best practices:
Always Reconcile Accounts First
Before you fill out the trial balance, reconcile all bank accounts, credit cards, and key ledgers. This ensures the balances you’re entering are accurate and up to date. Entering unreconciled data will only carry mistakes forward into your reports.
Double-Check for Debits = Credits
Use a template with built-in formulas to total both columns. The moment you finish entering balances, check that the debit and credit totals match. If they don’t, don’t move forward until you fix the imbalance first.
Investigate Imbalances Immediately
If your totals are off, start troubleshooting right away. Common places to look are:
- Did you use the wrong account balance?
- Did you enter a debit in the credit column (or vice versa)?
- Did you miss a journal entry or enter one twice?
Fixing it now is easier than untangling errors after you’ve already built out financial reports.
Perform Regular Reviews
Don’t wait until year-end to run a trial balance. Incorporate it into your monthly or quarterly close process or before any tax filing, reporting, or audit. Regular checks reduce the number of errors that pile up and make year-end much smoother.
Match Trial Balance with General Ledger
Your worksheet should always reflect the general ledger. Cross-check balances to ensure nothing is left out or misclassified. A mismatch here often signals a deeper issue, like an entry that never made it from the journal to the ledger.
Automate the Process
Templates work well enough when you’re managing just a few clients, but as you onboard more, they become less effective. Entering ledger balances manually increases the risk of errors and takes much more time across multiple clients.
That’s where accounting software like QuickBooks and Xero helps. These tools automatically post transactions to the general ledger using double-entry accounting, so you don’t have to record every journal manually. This keeps entries structurally balanced, though you still need to review trial balance reports to catch misclassifications, omissions, or duplicates.
Scale Your Firm With Financial Cents
Every accounting or bookkeeping firm needs a reliable trial balance worksheet. It ensures that accounts are posted correctly, transactions are balanced, and financial reports are built on accurate data. That accuracy translates into better work for your clients and more trust in your firm.
A well-structured template saves time, reduces errors, and gives your team a consistent process to review each client’s books before reporting. But as your client base grows, spreadsheets alone aren’t enough. Managing dozens of trial balances manually is time-consuming and leaves too much room for mistakes.
That’s where Financial Cents makes the difference. It’s an all-in-one practice management software built specifically for accounting and bookkeeping firms. Here are some of its features:
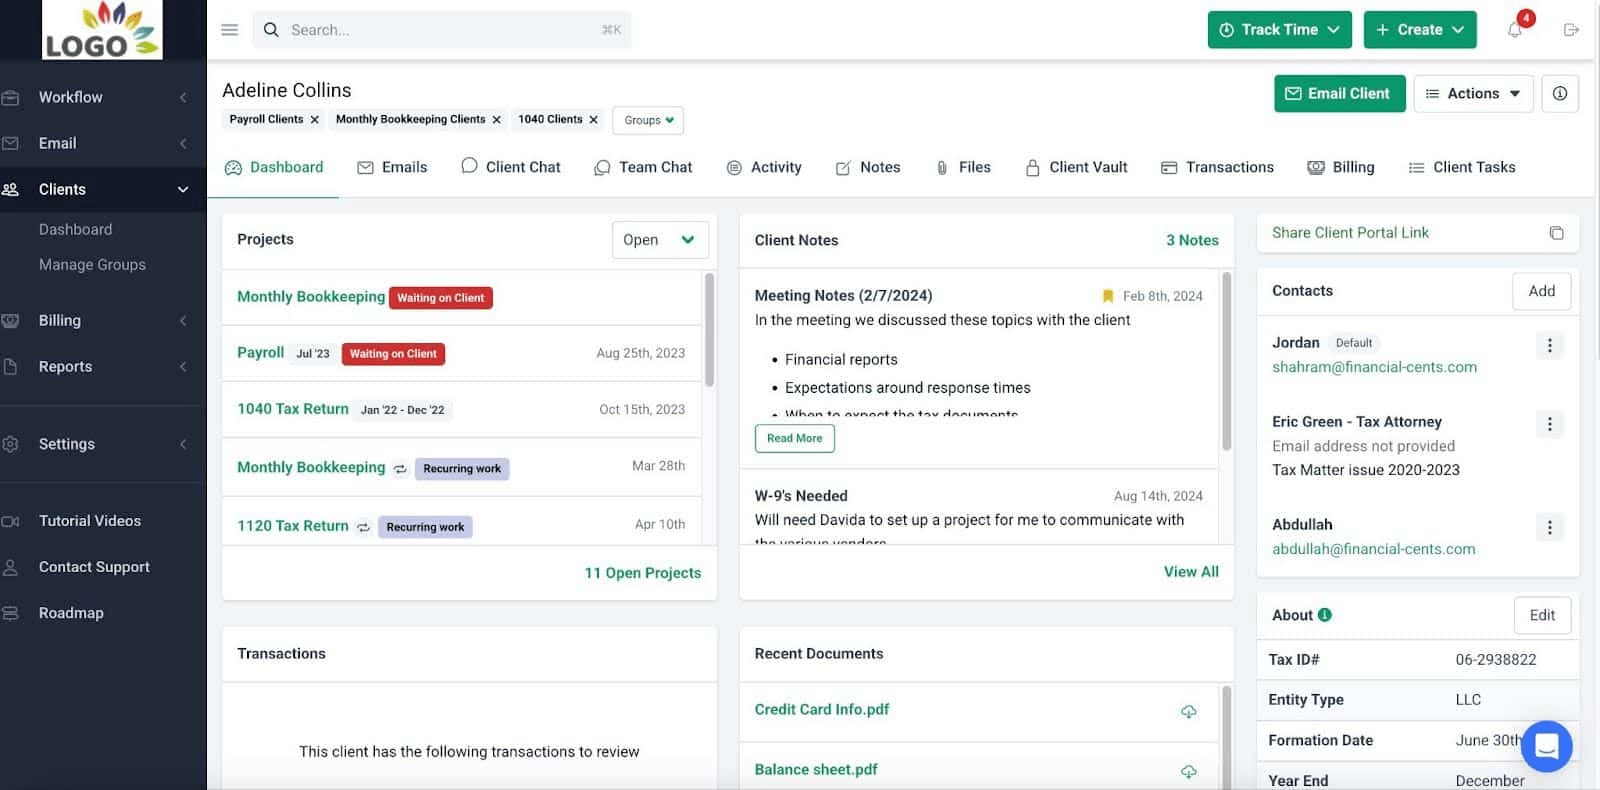
- Workflow Management: Financial Cents has a workflow dashboard that gives you a centralized view of all client work in progress. You’ll see who’s responsible for what, which tasks are due next, and how close each project is to completion. This ensures no task falls through the cracks and you always meet deadlines.
- Client document collection: Financial Cents makes it easy to collect documents from clients without the email back-and-forth. You can send document requests directly from within the app and automate reminders until clients upload the necessary documents via the secure client portal.
- Standardized Processes: Financial Cents helps you standardize how your team completes work across all clients by using reusable workflow templates (checklists). You can create a custom workflow for your trial balance process, outlining each task, its order, and any dependencies. so your team follows the same steps every time.
The platform also has 200+ prebuilt workflow templates for key processes like monthly bookkeeping, client onboarding, tax planning, and payroll. These checklists guide your team through each step of the work, helping you deliver consistent, accurate results without having to build workflows from scratch. - CRM Solution: Instead of switching between tools, Financial Cents gives you one place to manage all your client info, projects, and communication. Each client has a profile that stores contact information, communication history (emails, messages, notes), projects and documents.
Use Financial Cents to manage your firm and processes.


