Congratulations on your decision to switch from spreadsheets to a workflow management software for workflow management in your firm.
Many firm founders spend hours on mundane tasks, hunt for client information in different places, and struggle to track the status of client work across several spreadsheets. In a recent workflow automation report that we published, bookkeeping and accounting firms reported that manual work took up most of their time, with some spending as high as 10 hours on manual tasks. Yet, the unfounded fear of the unfamiliar keeps them from taking advantage of the features that can help their firms:
- Automate workflows to manage client work, hit deadlines, and see who is working on what.
- Track time for over-budget work to eliminate bottlenecks to stay productive and invoice clients seamlessly.
- Manage team capacity by seeing who is overworking and redistributing work where necessary.
But you understand that what has worked for you till now will not serve your next phase as a firm.
You may feel overwhelmed for two reasons: (1) You don’t know whether the workflow management software will be easy to implement. (II) You want to be sure the accounting workflow software you eventually choose serves your specific needs.
You will be shocked to learn how fast and easy implementing an accounting workflow management solution can be. For example, five steps are enough for you to set up and make Financial Cents the single source of truth for your firm.
We have chosen to walk you through the process with Financial Cents for many reasons. It is easy to use. It also makes managing client information, automating client requests, and collaboration a breeze. Unlike the complex and generic systems of most options out there.
Move from Spreadsheets to a Workflow Management Software in Five Steps
Implement the following fives steps and you’re on your way to managing client work and information so that nothing falls through the cracks
CREATE AN ACCOUNT (WITHIN SECONDS)
Creating an account with accounting workflow management software is the first step in the transition.
In Financial Cents, all you need to do is click this link, and you’ll need to enter:
- Your name.
- Company name.
- Email address.
- The password you want to use.
- Firm size and click on “Register.
INVITE YOUR TEAM
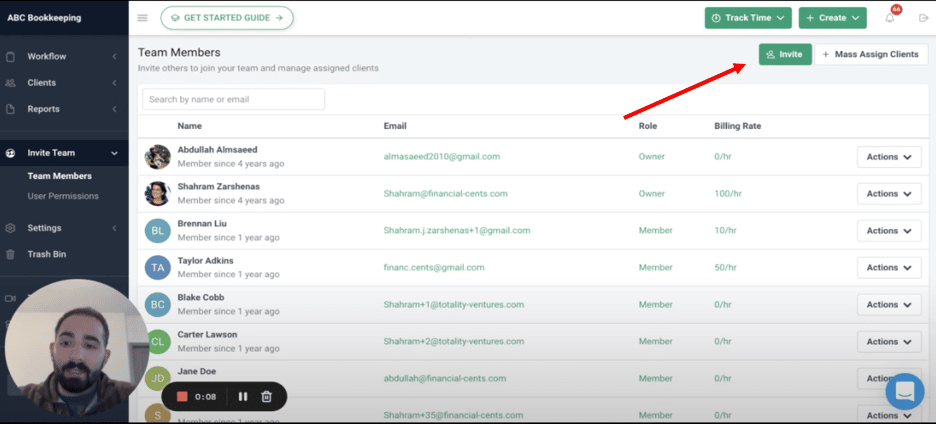
Once you have created your account, you can proceed to invite your team, so you can delegate work and track progress.
To invite your team:
- Click the green button at the top right corner of your screen (as you can see below).
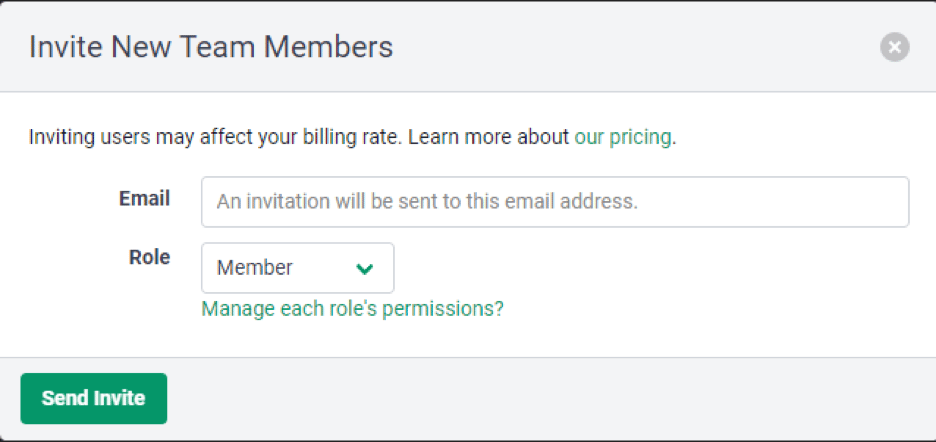
A dialogue box (pictured below) will appear for you to input the teammate’s email address.
- In the same dialogue box, give the team member a role—member, admin, or owner. Now, this is a big one. Their permission level will determine what they can see and do within your team’s Financial Cents Account.
- Once you hit the “Send Invite” button (at the bottom left corner of the dialogue box).
- They’ll receive the invite and accept it to join the rest of your team in Financial Cents.
SET UP YOUR WORKFLOW TEMPLATES
Once you have imported your team on Financial Cents, it’s time to set up your workflows. Workflows are the steps that go into completing client work in your firm. The more detailed they are, the easier it is for your team to use so you can maintain consistent work quality.
You can create your workflow templates in two ways:
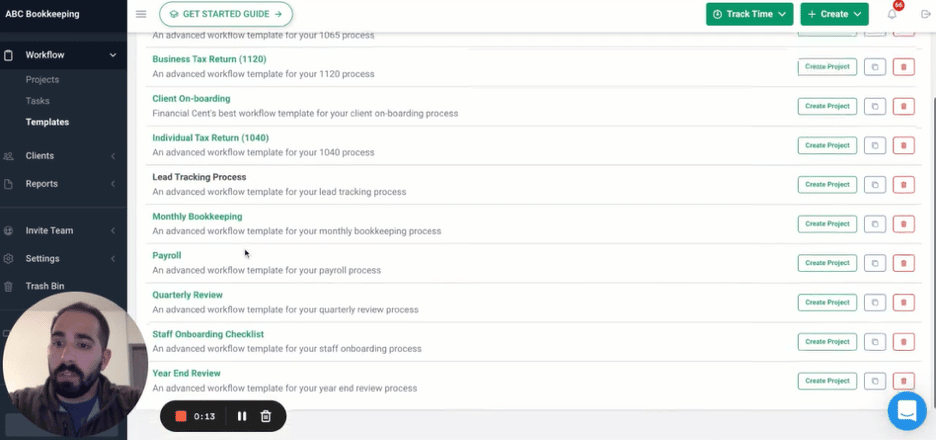
- Use a template from Financial Cents’ library.
- Create your workflow from scratch.
To use templates from the Financial Cents template library, click the templates tab to open the template library and select the workflow template that suits the client’s work.
To create from scratch, you need to:
- List all the tasks your firm performs for clients.
- Pick one client work and list all the steps (workflow checklist) anyone on your team will need to take to complete it. (Do this for all the tasks you listed in Step 1).
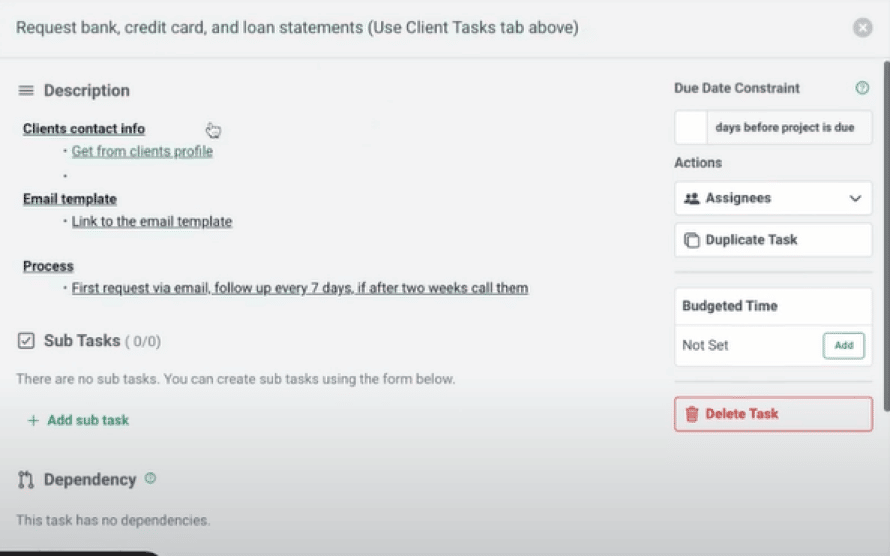
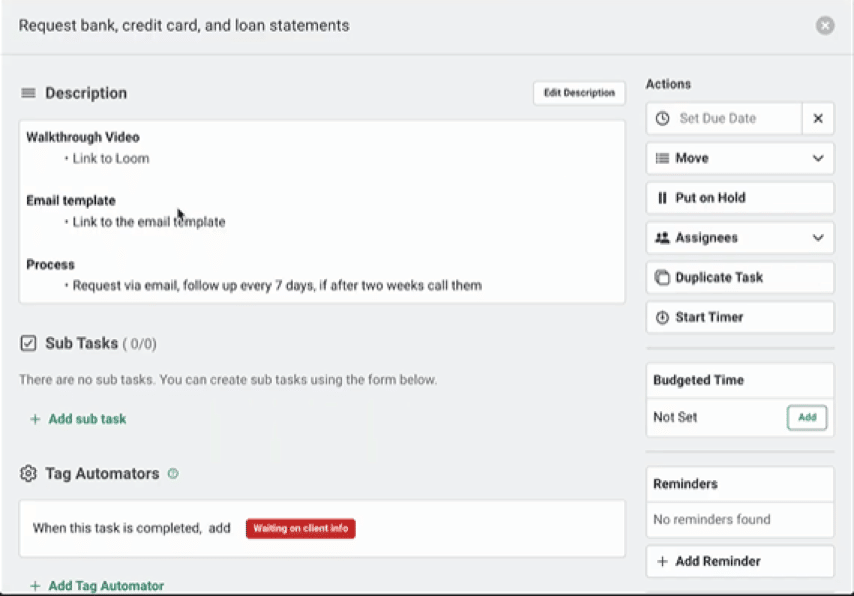
- To provide more context for the work, click on it to open a window for you to add more information the assignee will need to complete it. This could be a description of the task, work-related documents, or dependencies).
After setting up your templates, you can now tailor them to specific client projects for your team to start working on.
IMPORT YOUR CLIENTS
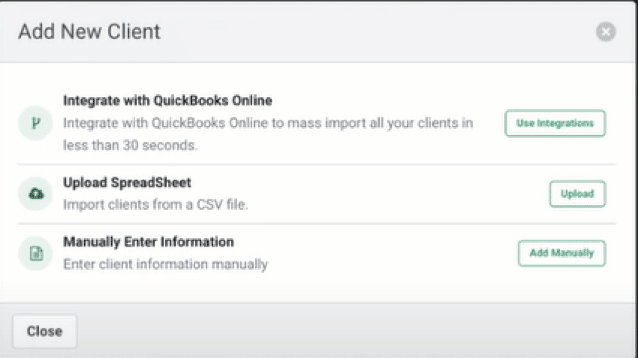
You have three options to add your clients to your workspace in Financial Cents:
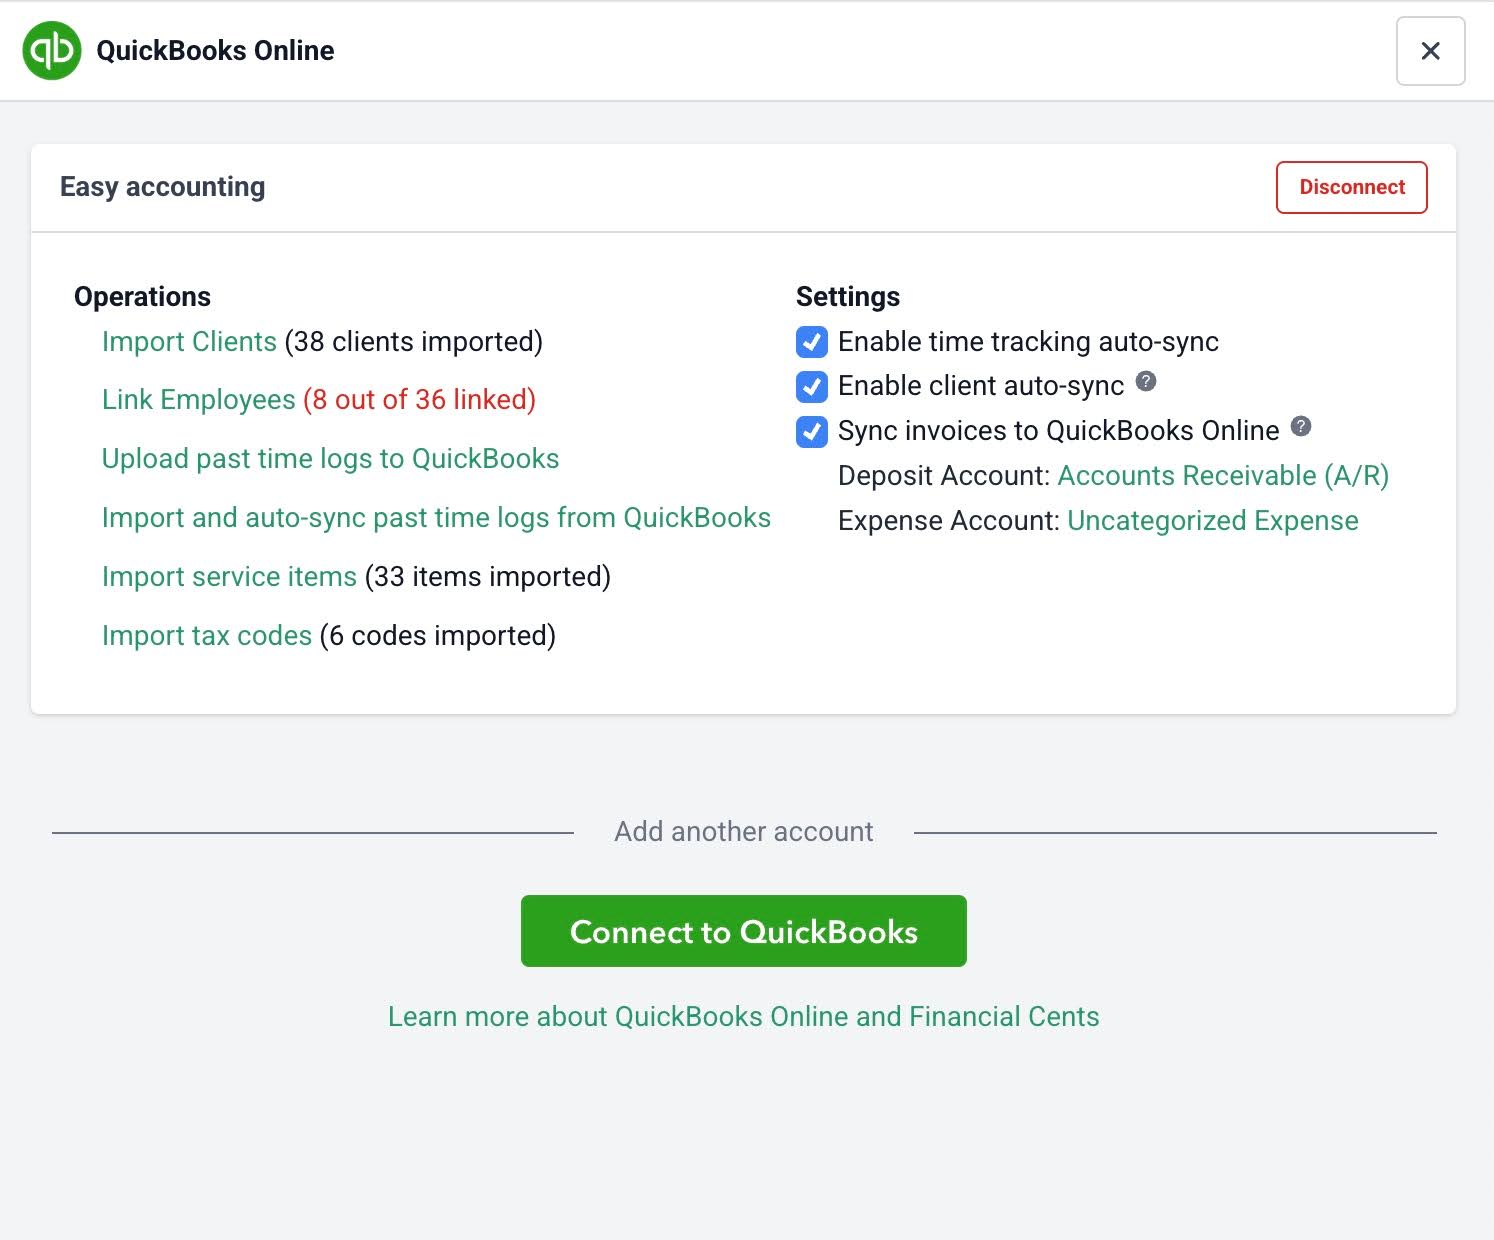
- Use your QBO integration to pull your clients and their information into financial Cents in a few seconds. This is the option we most recommend.
But if you don’t have a QBO account, you can also import your clients by:
- Uploading clients from your spreadsheet through a CSV file with the Upload Spreadsheet option.
- You can also add your clients one after the other.
To import your clients using the QBO integration:
- Click the Use Integrations button next to “Integrate” with QuickBooks Online, and you’ll be taken to QuickBooks Online.
- You will need to sign in if you are not signed in.
- Click Connect to Financial Cents.
- Choose whether you want to import all your clients in the following window.
You can also select specific clients if you don’t want all of them in your accounting workflow management software.
- In about 30 Seconds, your clients and their contact information will populate your Clients tab on the left-hand side of your dashboard.
- Clicking into each client will allow you to store all information concerning that client—including their documents, emails, usernames, passwords to their apps, and notes about their work. That way, your team can easily find and use the information for their work.
CREATE PROJECTS
Now is the time to create projects from the templates you created earlier.
To do that:
- Click the “Create Project” button (the green button on the right side of your screen).
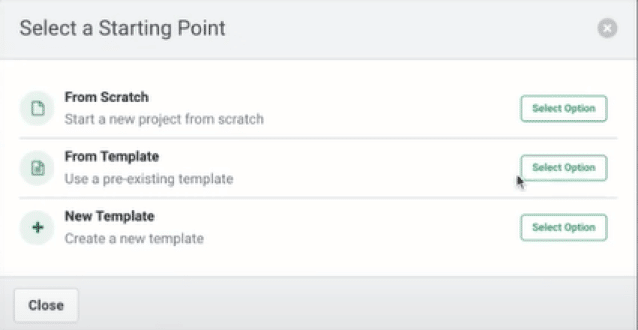
- From the following dialogue box, choose whether to create From Scratch, From Template, or a New Template.
- If you choose to create From Template, the Financial Cents will show you all your workflow templates.
- Go ahead and select the one that suits the project you want to create.
- Once you have selected the template, you can start adding the specific project details, including project title, start, and due dates (if you want the project ready before the actual due date, you can set an internal due date). The client the project is for and assign it to a teammate.
- You can also set the accounting period to let your team knows the week, month, and quarter the project belongs.
- After adding the specifics, you can click Done to add the project to your dashboard.
Remember the workflow checklist we mentioned earlier? Now that you’ve created the project, your team can start implementing and checking them off as the work progresses through the stages. And the progress will reflect on the workflow dashboard so you can track its progress level at a glance.
Remember: Your projects tab is where the work happens. You can share comments and files and pin relevant emails to align your projects.
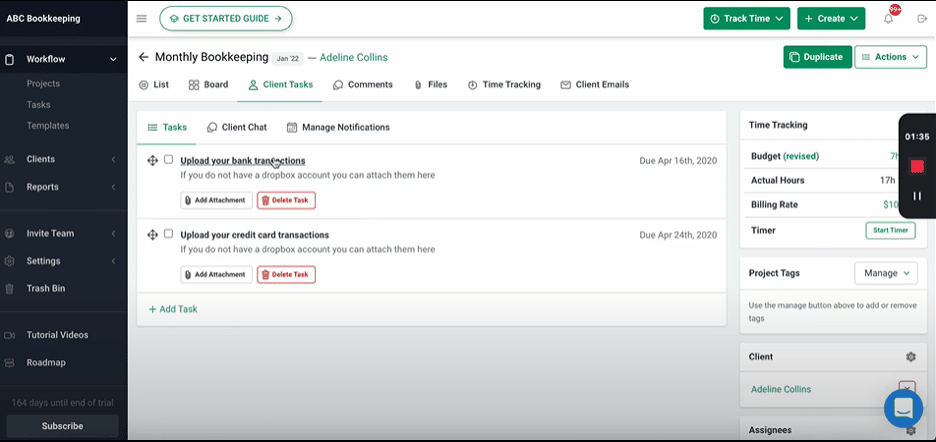
The Client Task feature saves you hours of chasing clients down for information. Automating the client task helps you auto-remind them to send the information.
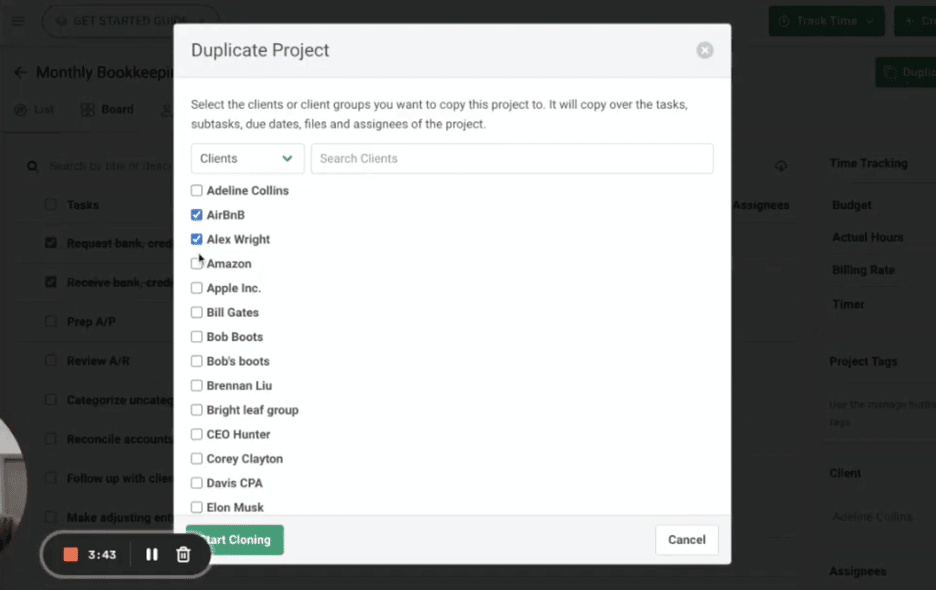
Duplicate Projects for All Clients, Instead of Creating One by One
Instead of recreating a particular project for all the clients that need that service, you can duplicate it across the relevant clients.
Then you can go into each client’s work to tailor it to their individual needs. If one of the client’s work needs additional steps, you can use the Add Task, Edit Task, and Delete Task buttons.
Manipulate your Financial Cents to serve you better with:
Tag automation
It lets you track the status of client work automatically. Instead of manually selecting and indicating a project with progress status, tags automatically show you how far ahead or behind schedule client work is. Tags immediately show you where client work stands from your dashboard.
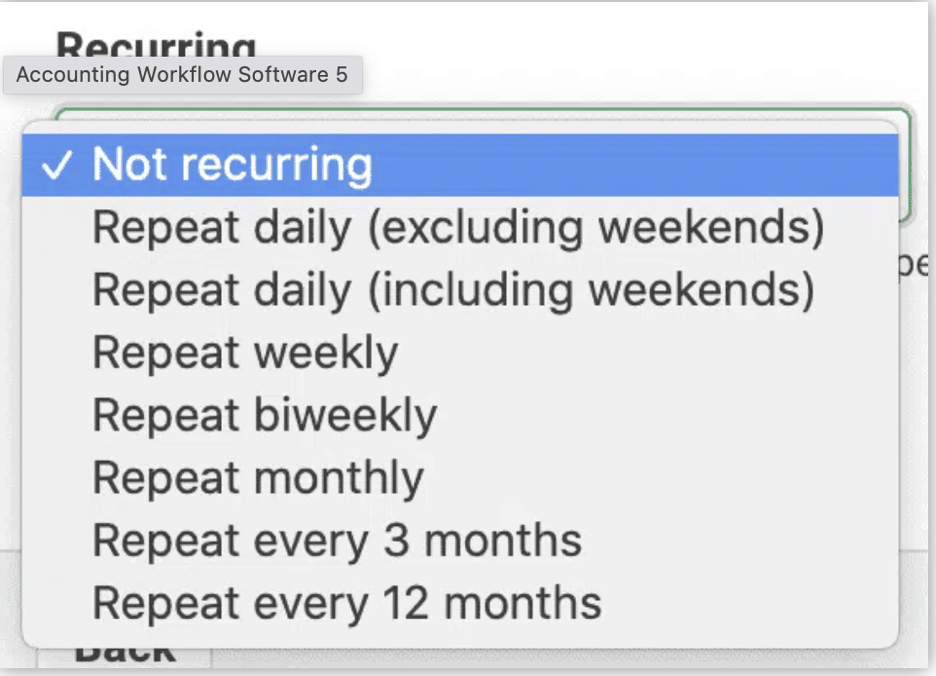
Recurrences
If you do a project regularly, you can make it recur, so you don’t have to recreate it the next time you need to complete it. You can set work to recur daily, weekly, monthly, yearly, etc.
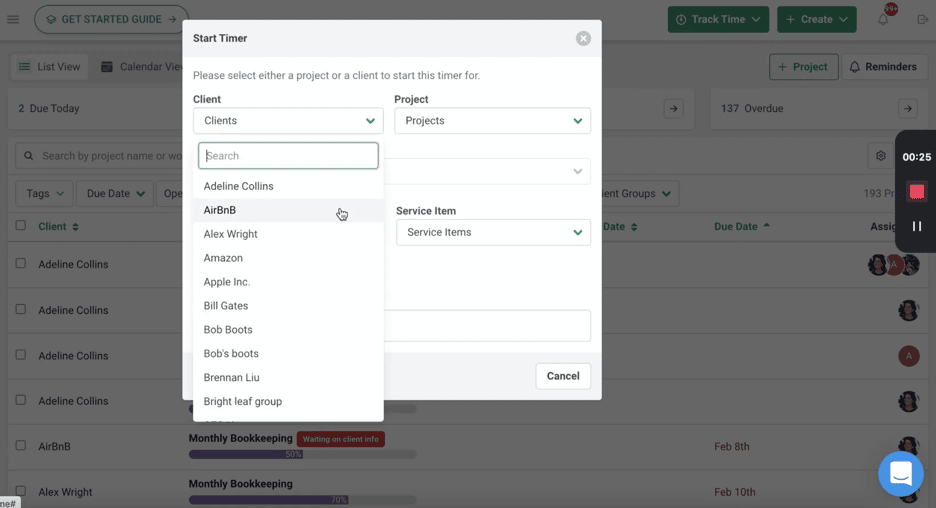
Time Tracking
It allows you to track time for client work so you can see over-budget work. That way, you can get the data you need to renegotiate your fees whether you bill by the hour or not.
You can track time from anywhere in financial cents by clicking the Track Time button on the navigation bar. Your time tracking reports are available on the Reports tab, and you can seamlessly upload time entries to QBO for invoicing.
Client Automated Tasks
This allows you to automate client data collection and save your firm hours of chasing down clients weekly.
You can list the actions they need to complete, add a description and automate it to send them a request at a set date, with the option to remind them after some days till they complete the tasks.
They will click the link they’ll receive to access the client portal and do what you need them to do.
CONCLUSION
It’s OKAY–not recommended–to use spreadsheets when you’re just starting. But as you scale, you wouldn’t be able to keep track of what’s happening in your firm. Things will fall through the cracks more often than you can imagine.
Meanwhile, workflow management software can help you hold everything together, keep all information you need at your fingertips and help you balance running your firm and having a good life–whatever that is to you.
Once you follow the steps above, your accounting workflow management software will be up and running immediately.
All you need to do is adjust things from time to time so you can continue to get the most out of the workflow management software features.
You Can Move from Spreadsheets to Financial Cents Now
